• Welcome
  • Book
  • Classes
    • Recipes
    • Index
  • Writing
  • Press
  • Shop
  • Contact
Menu

Sonya Michelle Sanford

  • Welcome
  • Book
  • Classes
  • Recipes
    • Recipes
    • Index
  • Writing
  • Press
  • Shop
  • Contact
saladolivieronsettable.jpg

Salad Olivier

December 31, 2017

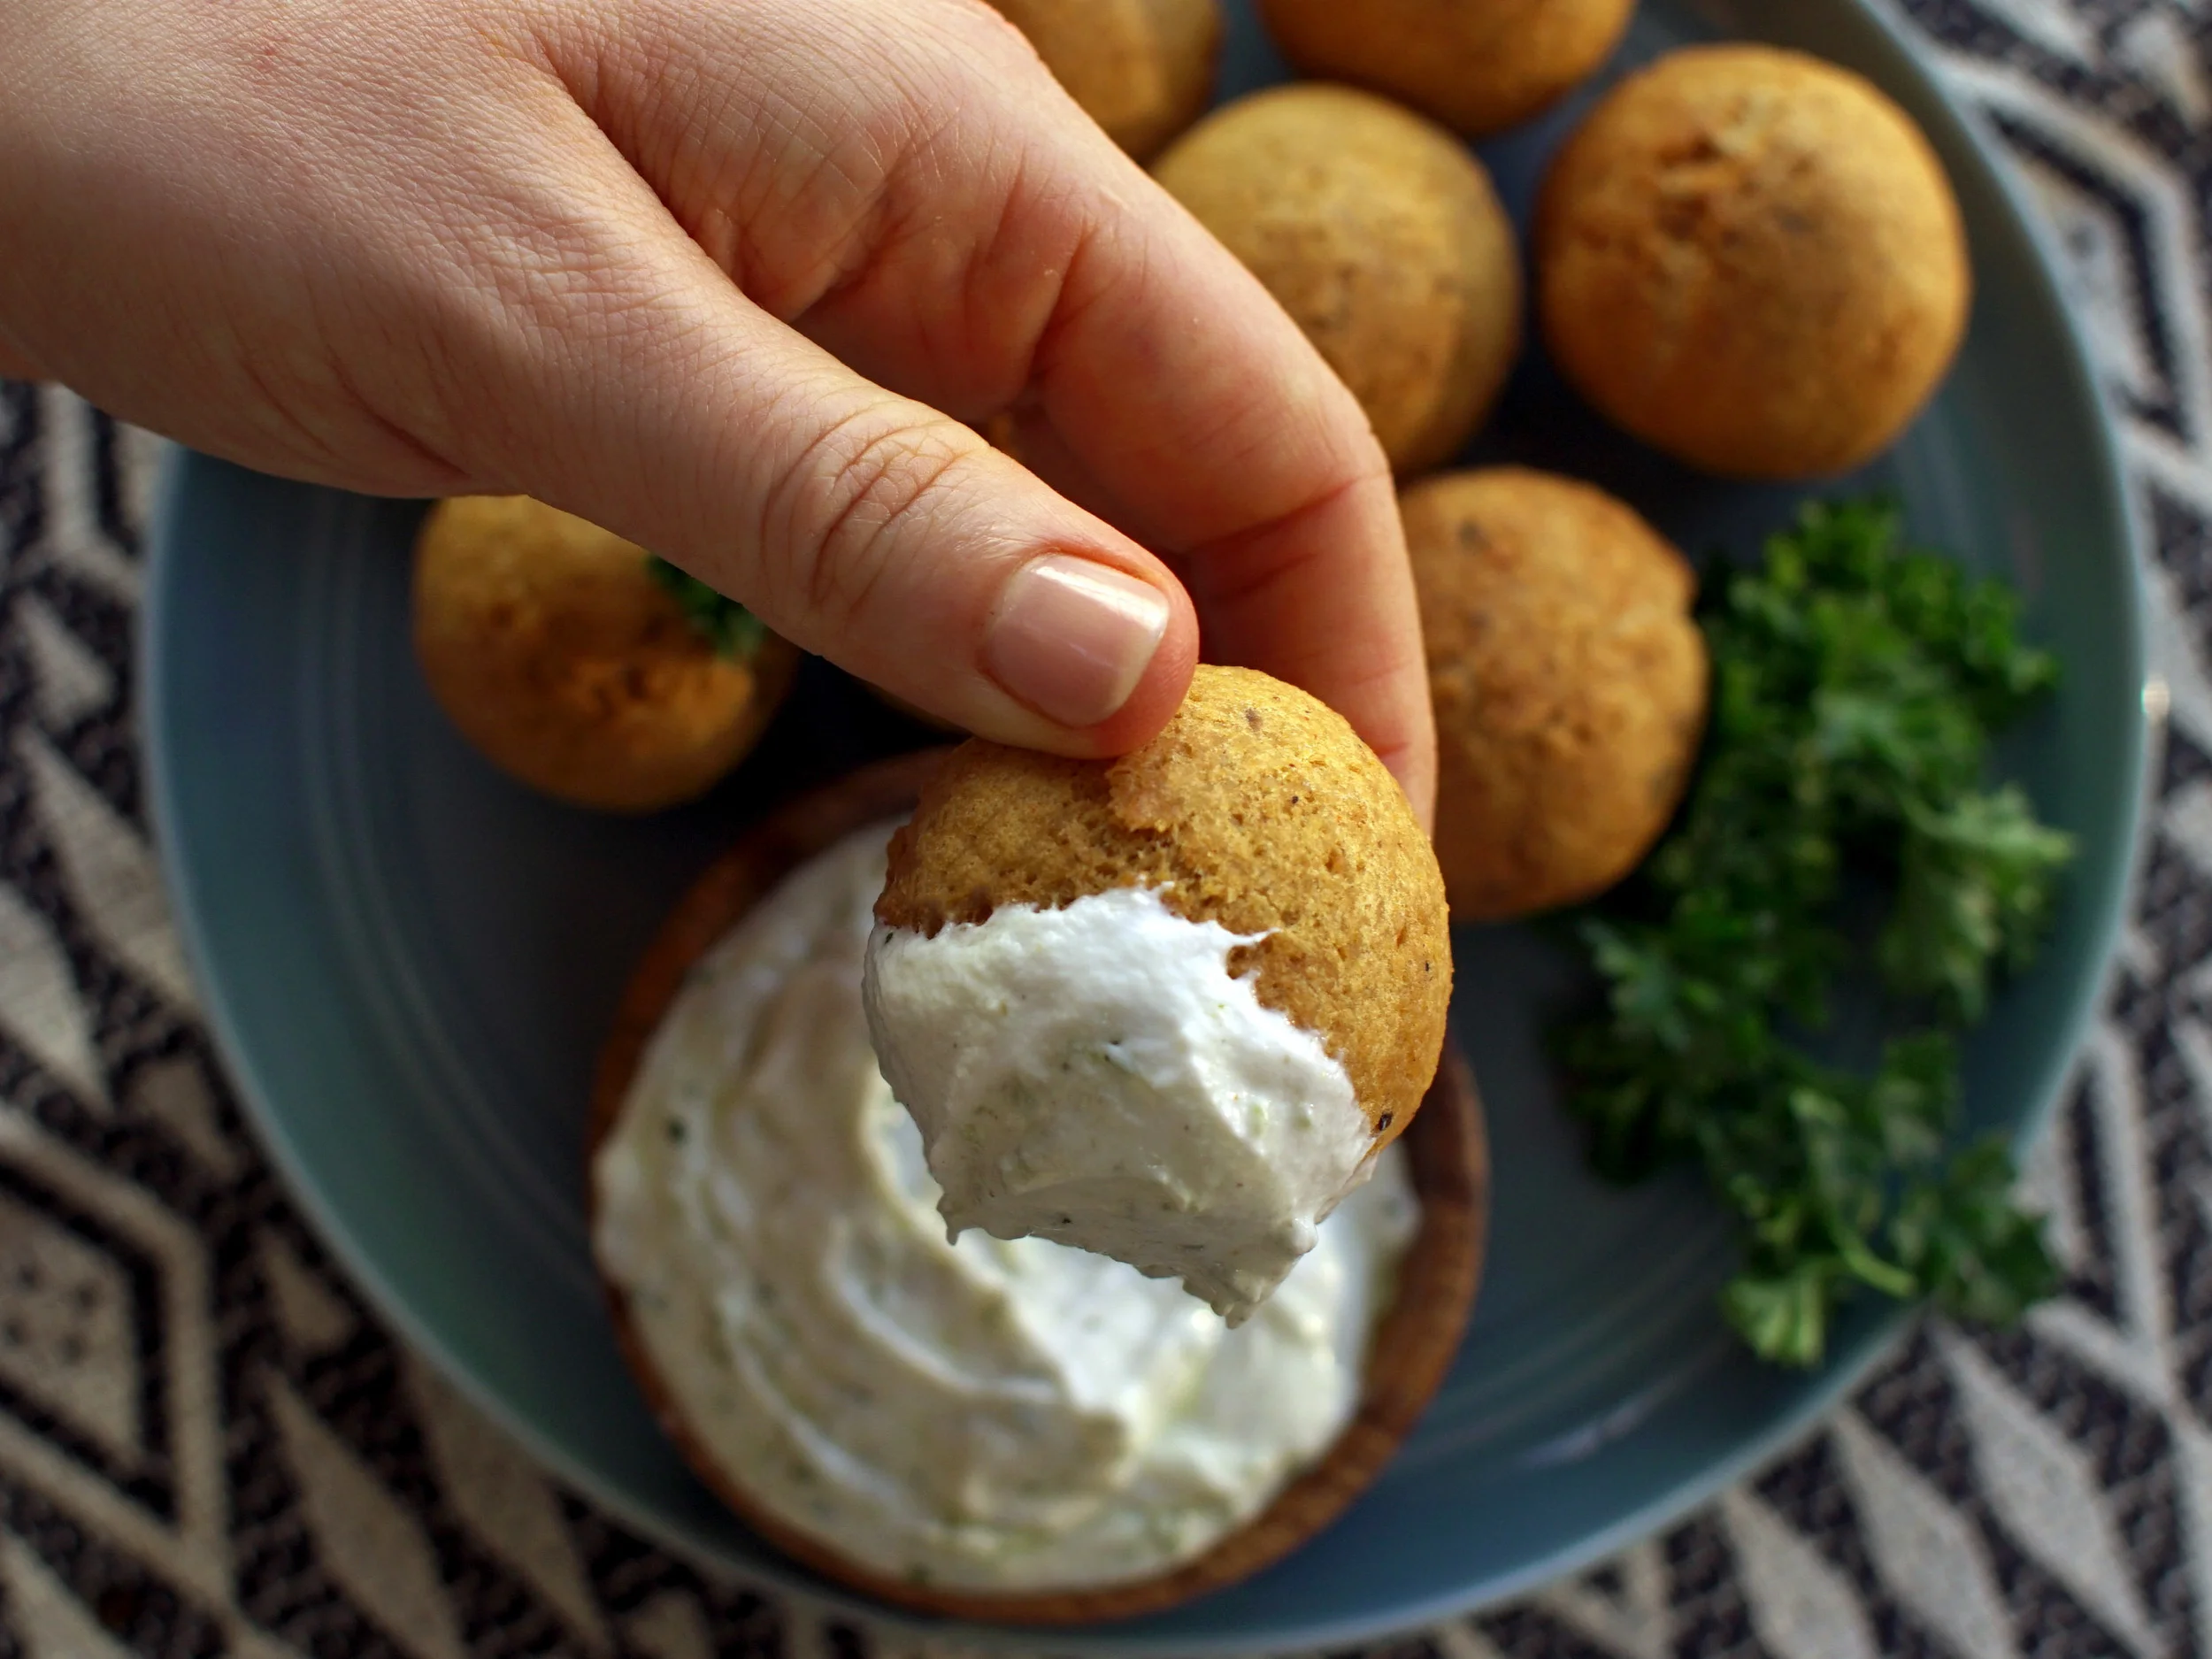
Full article is available via The Nosher

...This salad was first prepared by Lucien Olivier in the 1860’s. Olivier was the French chef of a famous restaurant in Moscow called The Hermitage, hence the very French name for this now popular Russian salad. Also, Russians were obsessed with French culture at that time. Salad Olivier was an immediate hit, and it became the restaurant’s signature dish. Originally, it was made with crayfish, capers, and even grouse. After the revolution, simpler and easier to come by ingredients were more commonly adapted into the recipe. These ingredients are also all conveniently available in the dead of winter.

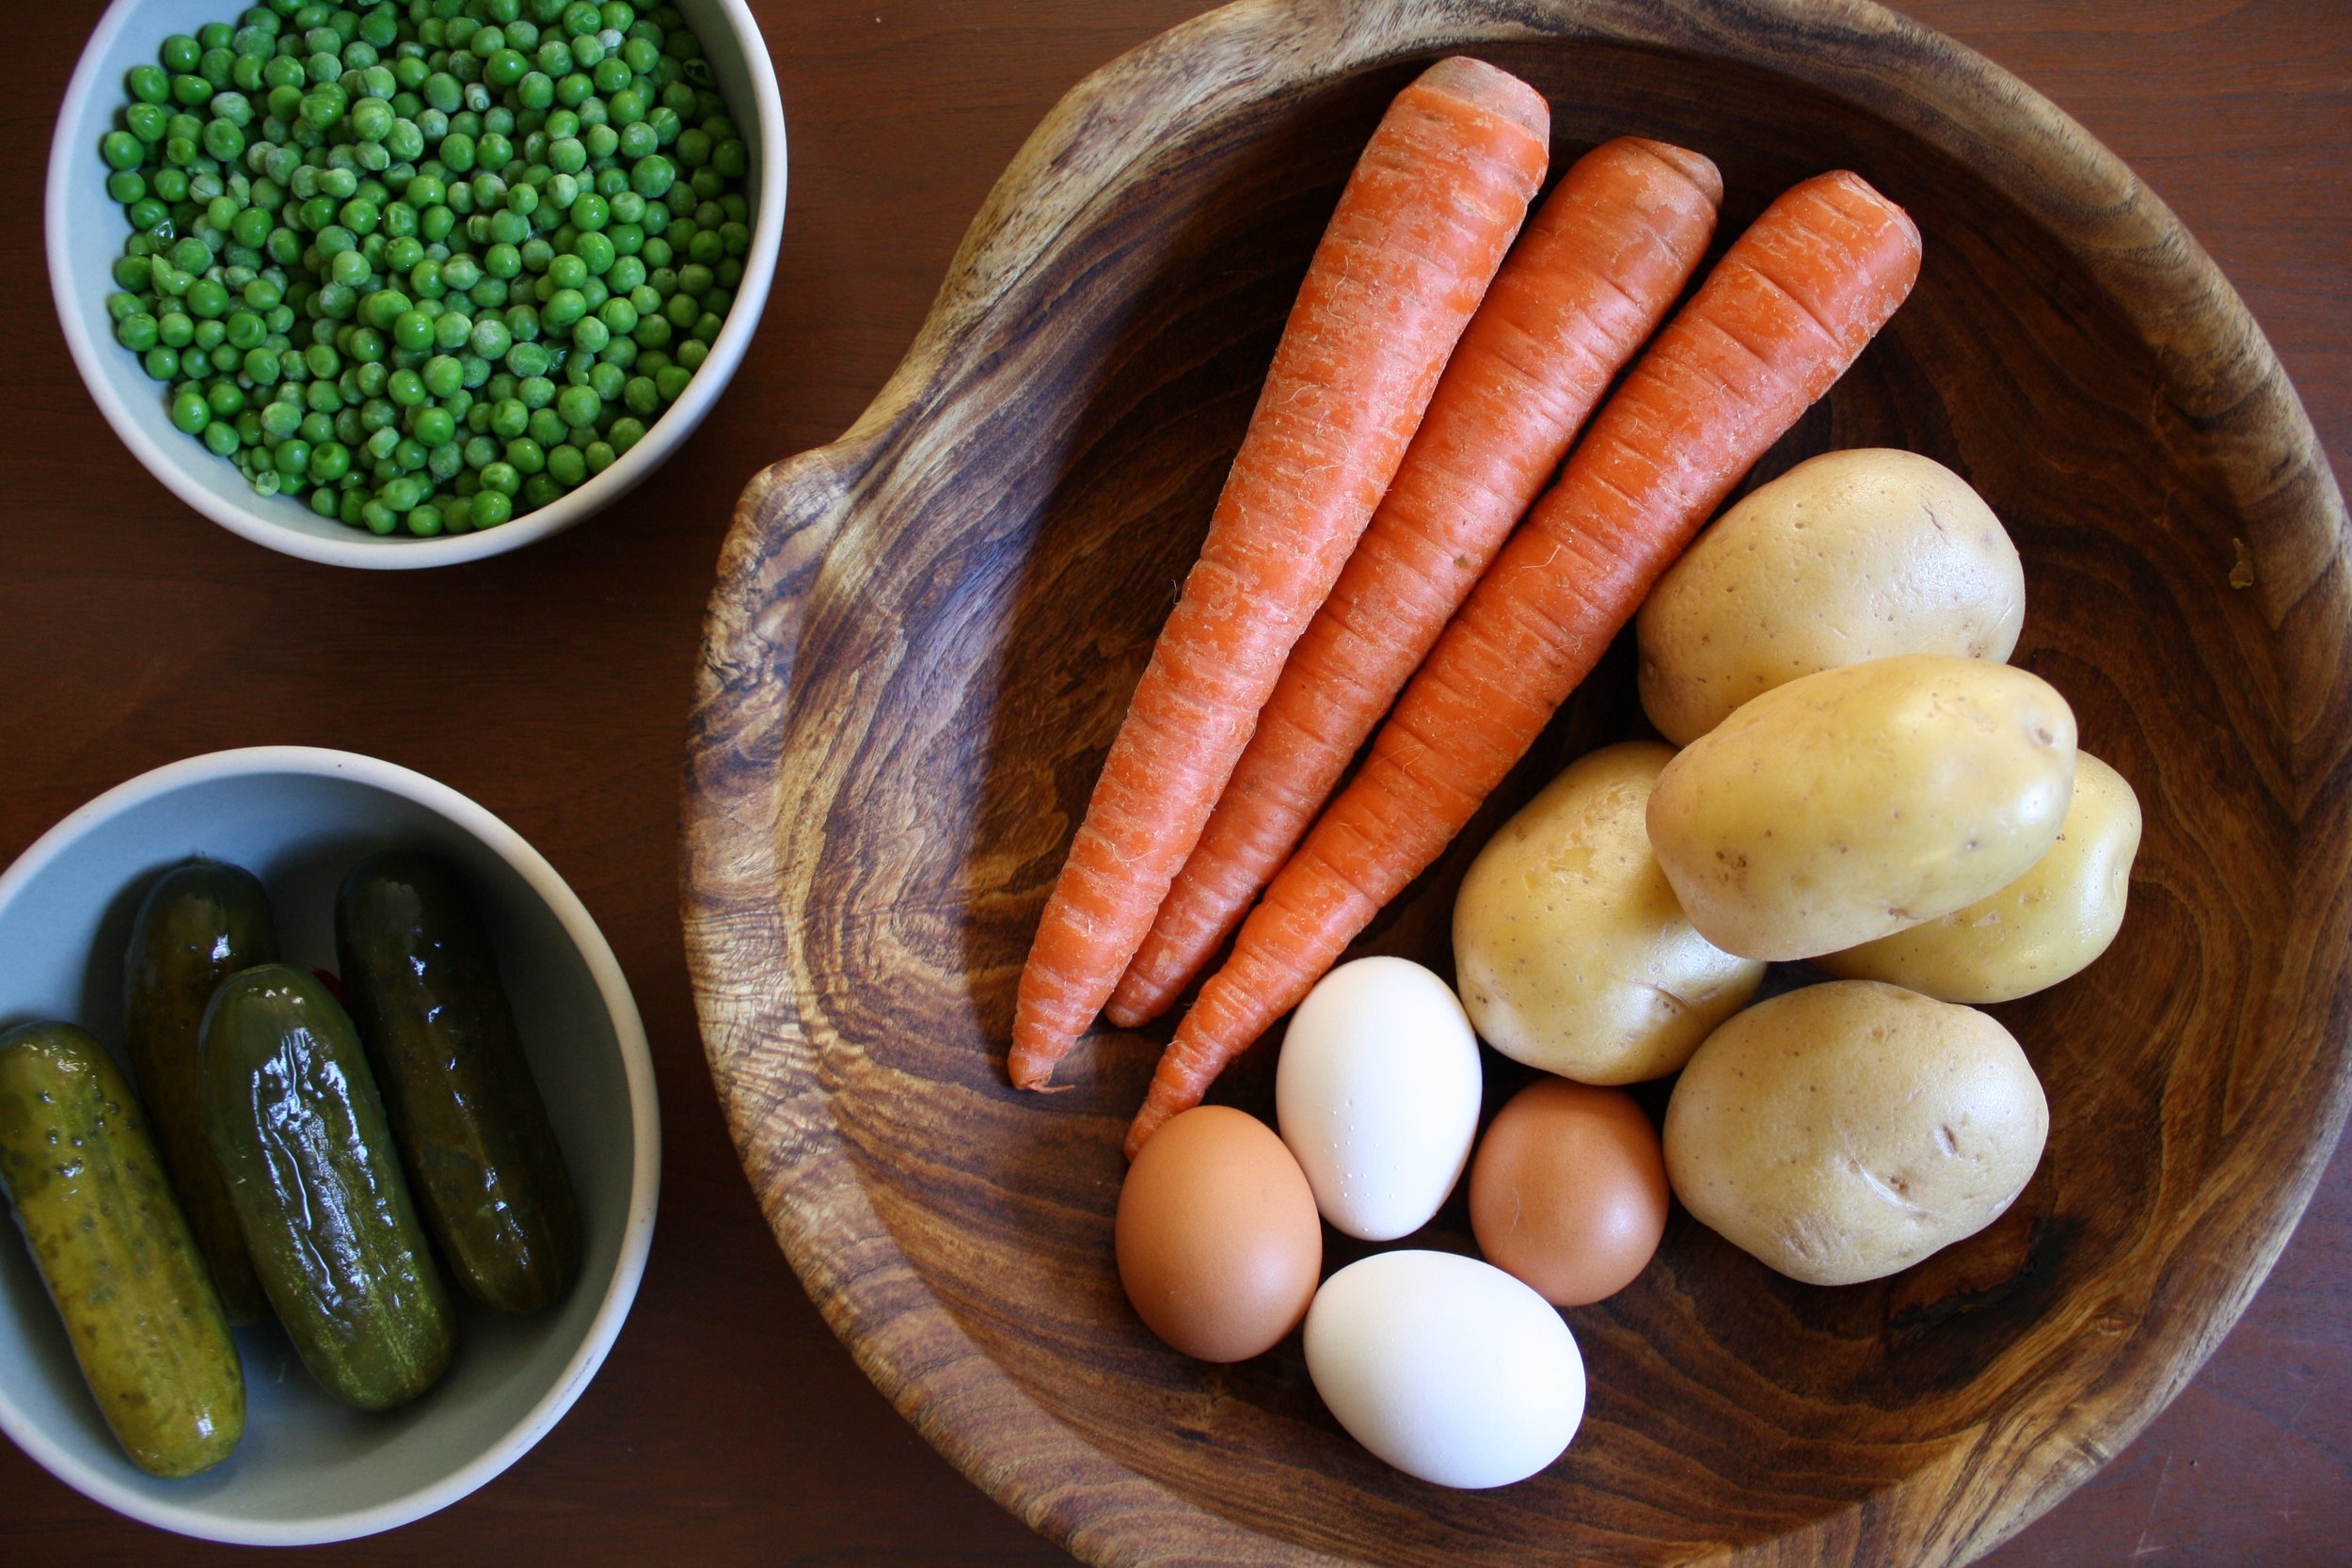
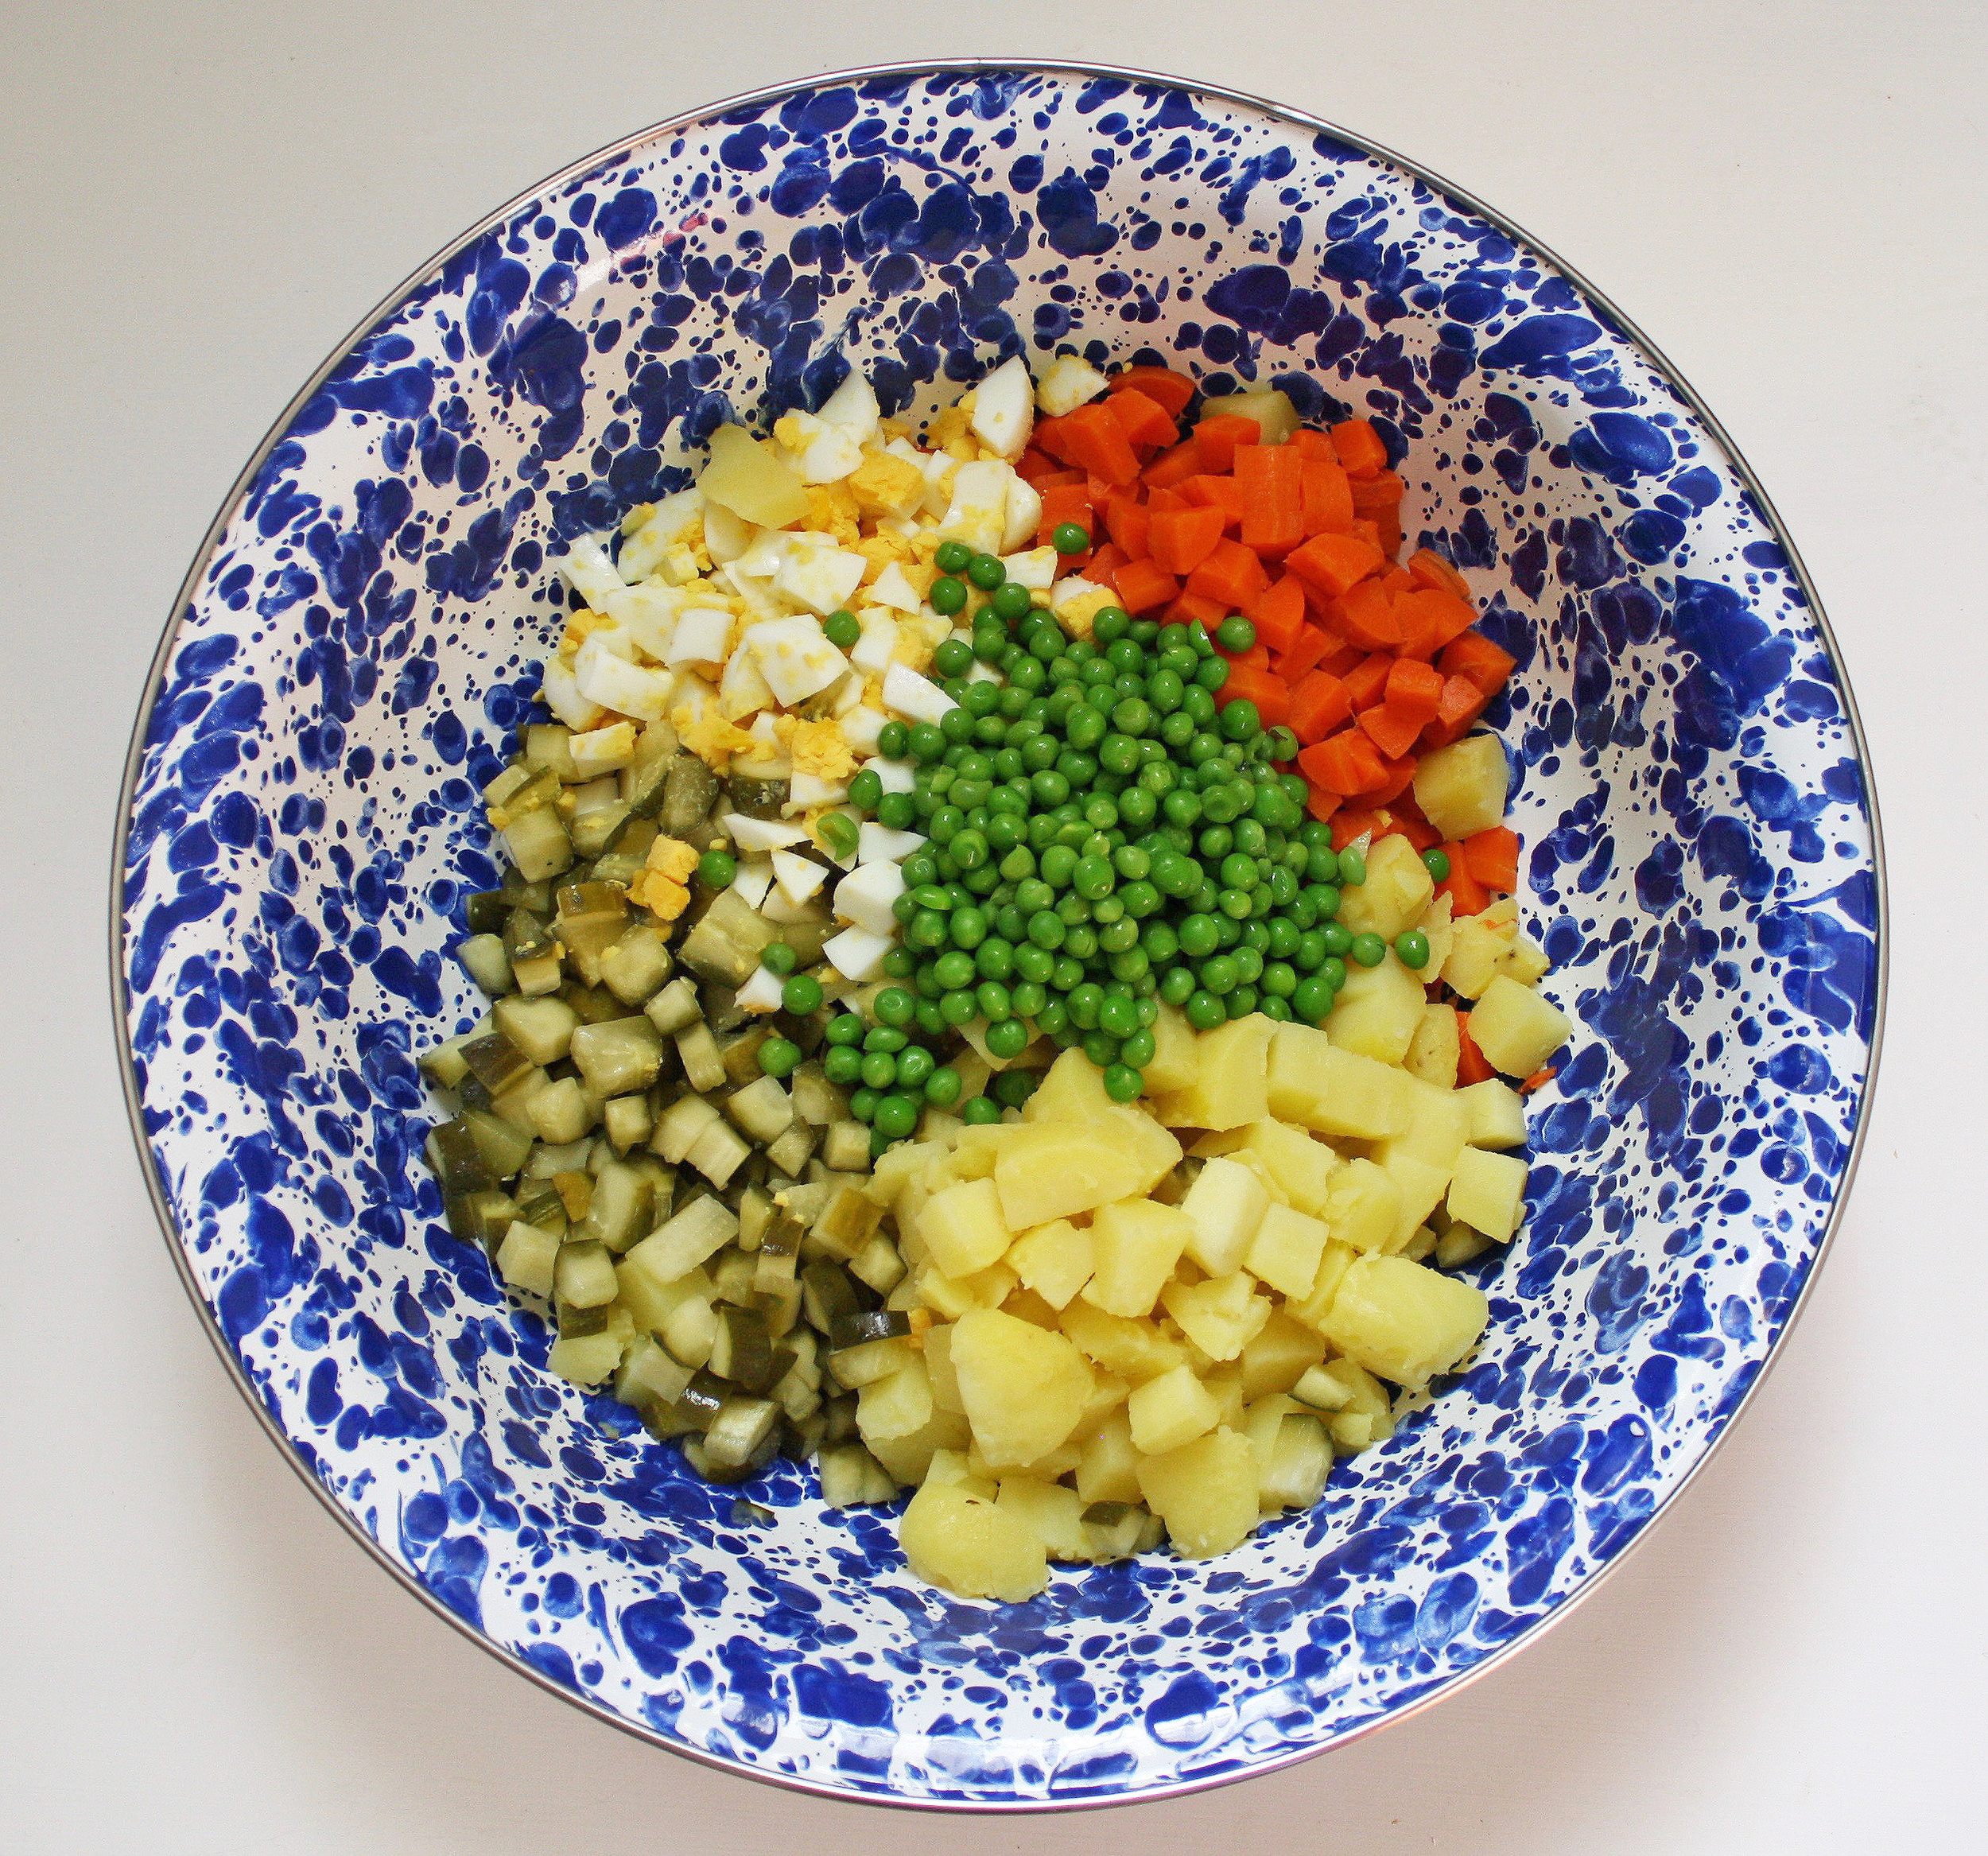
The popularity of the salad spread beyond Russia to Eastern Europe, the Balkans, and even to Iran and Pakistan. In fact, in our family we call this dish Salad de Boeuf (pronounced as “de beff”), which is what this salad is inexplicably called in Romania and Western Ukraine. Boeuf means “beef” in French, and this salad contains no beef at all. In each geographic locale, the salad might differ slightly. Sometimes the potatoes are mashed instead of cubed, or there’s shredded chicken instead of smoked meat, or sometimes there’s no meat at all, as was the custom in our family. What makes this type of potato salad uniquely a Salad Olivier is the presence of potatoes combined with carrots, peas, pickles, and hard boiled eggs. Everything should be chopped to roughly the same size. The appeal of something seemingly odd and vaguely average is ultimately mysterious, but the combination of hearty firm potatoes, sweet cooked carrots, crisp pickles, earthy peas, and silky eggs in a creamy tangy dressing just works. The ingredients meld all together, each losing its own particular edge to combine to make a complete range of salty, sweet, tangy, satisfying tastes in each bite. I think this salad’s enduring and far-reaching popularity proves that it’s eaten for more than tradition’s sake.

If you’re going to attempt to make this for the first time there are a few things to know. For one, this recipe reflects how my family likes this dish. If you’ve had this before it might be slightly different from what you’re used to. More importantly, the quality of each ingredient matters to the overall success of the dish. I like to use Yukon Gold potatoes because they hold up well and have a pleasant rich sweetness, but you can definitely try it with your favorite potato. Taste the carrots before you cook them; they should be sweet and flavorful, not the dull astringent variety you sometimes end up with. The best pickles for this dish are ones that come from the refrigerator section, that still have a crunch, and are brined in salt with zero vinegar added. They’re also known as “naturally fermented” pickles. The type of mayonnaise you use is also key, and I swear by Hellmann's/Best Foods brand mayo.

Salad Olivier

Serves 6-8

Ingredients:

  • 1.5 lbs Yukon Gold potatoes, about 4-5 medium
  • 3 large carrots
  • 4 large eggs
  • 3 large dill pickles, or to taste (use naturally fermented/brined pickles)
  • 1 cup frozen peas, thawed (you can substitute with fresh cooked peas or even canned)

For the dressing-

  • 1 cup good quality mayonnaise
  • 2 tablespoons olive oil
  • Juice of ½ a lemon, or to taste
  • 1 Tablespoon pickle liquid (optional)
  • ¾ Tablespoon kosher salt, or to taste
  • 2 Tablespoons chopped fresh dill (optional)
ingredietntspre-cooked.JPG

Directions:

 Wash the potatoes and carrots well. Add them to a pot, and fill with water. Bring the water to a boil, and boil the potatoes and carrots until easily pierced through with a knife. The carrots will cook faster, about 15-20 minutes. Once they’re tender remove them from the pot and allow the potatoes to finish cooking, about 15-20 minutes more, or 30-35 minutes in total. Be careful not to overcook your potatoes and carrots, you do not want them to end up as mush in the salad. Once cooked, set aside to cool or refrigerate. This step can be up to 2 days in advance.

While the potatoes and carrots are cooking, hard boil your eggs and allow them to cool.

Once cooled, carefully remove the peels from your potatoes. You can either remove or keep the peel on your carrots depending on your preference.

Cube all of the potatoes, carrots, and eggs to the same size. I like a medium-small dice.

Dice the pickles slightly smaller than the other ingredients as they have a stronger flavor.

Add the cubed potatoes, carrots and eggs to a large bowl. Add the pickles and thawed peas to the bowl.

In a separate small bowl, combine all of the ingredients for the dressing and whisk together. Taste and adjust accordingly.

allchoppedingredientsinabowl.jpg


Add the dressing to the potato mixture, and carefully stir until everything is fully coated in the dressing. Taste and add more salt if desired (every brand of kosher salt differs in salinity). If you want it creamier/tangier, add more mayonnaise or lemon juice. You can also use sour cream or yogurt if desired.

Allow the salad to chill for at least one hour before serving so that the flavors can all come together. This salad can be made up to a day in advance, and stores well for 2 days. You can also make this without the dressing up to 3 days in advance, then add the dressing before serving.

Before serving, transfer the salad to a serving bowl. This salad is known for being creatively decorated and festively garnished with fresh herbs, vegetable roses, etc. You can doll it up in any way you like.

saladolivier_justthesalad.jpg
In Holiday, Dinner, Appetizer, Lunch Tags Salad Olivier, Olivier, Russian cooking, Jewish cooking, salad, potato salad, potato
Comment
SquashOnionBurekas_favorite.jpg

Butternut Squash and Caramelized Onion Burekas

November 20, 2017

This is a seasonal twist on classic burekas that I wrote up for alma. (check out their site for the full article). The caramelized onions are the key ingredient in this dish; they always take longer than you think to caramelize, but the resulting flavor is worth the work. This makes a great side, appetizer, or snack during the holidays. 

Butternut Squash and Caramelized Onion Burekas

Makes 24 burekas

INGREDIENTS

  • 2 sheets puff pastry (10” x 15”), defrosted in the refrigerator overnight
  • 1½ lbs. butternut squash (1 large squash), halved lengthwise and seeds removed
  • 1 large yellow onion, medium diced
  • 2 tablespoons olive oil or butter
  • 1 big fat clove of garlic or 2 medium-sized, minced fine
  • 1 teaspoon ground coriander
  • 2-3 sprigs thyme, leaves removed from stems
  • Pinch of cayenne pepper
  • Salt and pepper, to taste
  • 1 large egg yolk
  • Black and/or white sesame seeds, to garnish

DIRECTIONS

Preheat the oven to 375°F.

Drizzle the halved butternut squash with oil, then place it cut-side down on a sheet pan. You don’t need to peel the squash. Roast until the squash is fully cooked and tender, about 35-45 minutes.

roastedsquash.jpg

While the squash is baking, caramelize your onion by putting a few tablespoons of butter with a drizzle of olive oil in a sauté pan over medium low heat. If keeping the dish non-dairy, use just olive oil. Add the diced onion to the pan, and sauté over low or medium low heat until starting to soften, about 5 minutes. Season with a generous pinch of salt and then continue to let the onion cook and caramelize, stirring occasionally so the onion doesn’t burn; make sure to keep the heat fairly low. This is where patience comes in, beautiful caramelized onions can take 30-45 minutes to make. You want your onions golden and sweet, you don’t need to caramelize them until they’re a deep brown. This is a good tutorial if you need it.

Add the minced garlic to the caramelized onions, and sauté for another 2-3 minutes or until the garlic is fragrant but not at all browned. Turn off the heat.

caramelizedonions.jpg

Once the squash is cooked and slightly cooled, scoop the inside of the squash into a bowl and discard the peel. Add the caramelized onion to the squash. Mix together. The mixture should be soft and not too lumpy.

Mix in the ground coriander, thyme, and cayenne. Taste, and then season with salt and pepper as desired. Allow the squash mixture to cool before assembling the burekas. You can make this filling up to two days in advance and store in the fridge.

To assemble the burekas: roll out a sheet of puff pastry until rectangular and just slightly thinner than when it comes out of the package. Divide the dough into 12 squares: cut the dough in half widthwise, and then cut each half into half again. Next, cut the dough into thirds lengthwise. Put a spoonful of the filling into each square. Fold over the dough to form a triangle shape, and press the edges together. There’s no need to crimp or press too hard, the filling will stay put, and you want to ensure there are layers of flaky pastry.

processshotofburekas.jpg

Transfer the formed triangular burekas onto a baking sheet, place each bureka about an inch apart, 12 will fit on each baking sheet. At this point, you can freeze the burekas and reserve them for when you’re ready to bake.

Before baking, combine the large egg yolk with a small splash of water. Beat well. Brush the tops of the burekas with the egg wash. Sprinkle with sesame seeds.

formedburekasprebaking.jpg

Bake for 20-25 minutes, or until golden brown and flaky. Transfer to a wire baking rack, and allow to cool for at least 10 minutes before serving. Burekas are best served warm or at room temperature.

squashburekassecondaryphoto.jpg
In Holiday, Dinner, Lunch, Appetizer Tags jewish food, kosher, burekas, squash burekas, caramelized onion, appetizer, holiday food, thanksgiving, thanksgiving food, jewish thanksgiving, pastry, homemade, baked goods
Comment
mbphotopdown.JPG

Matzah Ball Pho

October 23, 2017

I wrote up my matzah ball pho recipe for The Nosher. Head over there to read the full article, and check out other great recipes :)

MATZAH BALL PHO

Ingredients

For the broth:

  • 2 medium unpeeled yellow onions, halved
  • 1 large 4”-5” piece of ginger, cut in half lengthwise
  • 5 quarts cold water
  • 1 4-5 lb. chicken, cut into parts
  • ½ lb. chicken wings
  • 2 tsp kosher salt, or to taste
  • 1 Tbsp rock sugar or Turbinado (raw) sugar
  • 1 cinnamon stick
  • 2 star anise
  • 1 tsp whole coriander seeds
  • 2 Tbsp fish sauce or tamari
  • 1 small white onion, thinly sliced
  • 4 scallions, thinly sliced

For the matzah balls:

  • 1 cup matzah meal
  • 1 teaspoon kosher salt
  • 1 teaspoon baking powder
  • ½ teaspoon baking soda
  • 4 large eggs, beaten
  • ¼ cup schmaltz or oil (vegetable or safflower)
  • ¼ cup minced scallion
toppings.JPG

For the toppings:

  • 1 large bunch of fresh Thai basil
  • 2-3 limes cut into wedges
  • 3 cups mung bean sprouts
  • 2 Fresno chilies or jalapenos, sliced thin
  • Hoisin sauce, to taste
  • Sambal oelek (garlic chili sauce), to taste
  • Sriracha, to taste

Directions

To make the broth:

  1. Char your onions and ginger by either placing them on a baking sheet under a broiler for 8-10 minutes or by charring them over a gas flame on your stovetop for a few minutes on each side. The onions and ginger should be nicely charred but still firm — this essential step will deepen the broth’s flavor. Once the onions and ginger are charred, remove the skin from the onion. Rinse the onion and ginger, and use a small knife to scrape off excess charred bits to prevent your broth from getting murky.
  2. Cut your chicken into parts, separating the breasts, legs, wings and backbone. This will ensure that your chicken cooks evenly and that the breasts will not become dry or tough when simmered.
  3. In a small skillet over medium heat, toast the cinnamon, anise and coriander until lightly browned and fragrant, about 2-3 minutes. Be careful not to burn the spices. Add the onion, ginger and chicken to a large pot. Fill the pot with 5 quarts of water. Bring the water to a simmer; skim the impurities as they rise to the top.
  4. After 20 minutes of simmering, or once they’re cooked through, remove the chicken breasts and allow them to cool. Add the toasted spices, salt and sugar to the pot. Continue to gently simmer the mixture for 1 hour.
  5. Remove the remaining chicken parts and strain the liquid through a fine meshed sieve. Bring the liquid back to a simmer for another 20-30 minutes, or until the liquid has reduced by about a quarter. This step will further deepen the broth’s flavor.
  6. While the broth is simmering, shred the chicken meat and reserve for serving. Once reduced, turn off the heat and add the fish sauce or tamari to the broth. Taste, and add additional seasoning if desired.
formedballs.JPG

To make the matzah balls: 

  1. While the soup is simmering, in a large bowl whisk together the matzah meal, salt, baking powder and baking soda. Add the beaten egg and schmaltz/oil. Add the scallions. Mix everything together until just combined. Do not over-mix.
  2. Refrigerate the mixture for at least 30 minutes, and up to a day.
  3. Form the matzah ball mixture into even-sized balls. You can determine the size based on your preference, but know that they will double when cooked. It makes it easier to form the matzah balls if you rub a little oil on your hands beforehand.
  4. Bring a large pot of water to a boil. Lower to a simmer and gently drop the matzah balls into simmering water. Place the lid on the pot and continue to simmer for 30 minutes. Once cooked, matzah balls are best stored in their cooking liquid.

To serve the matzah ball pho:

  1. Add the shredded chicken, raw sliced onion and scallions to a bowl. Ladle hot broth into the bowl. Add the matzah balls to the soup.
  2. Serve along with basil, bean sprouts, lime wedges, hoisin and hot sauces. Allow people to garnish and customize their pho to their liking.

Note about the recipe: Traditional Pho Ga calls for fish sauce in its broth. Fish sauce is made of fermented anchovies. Red Boat makes one that is certified kosher, but many who keep strictly kosher will not combine fish and meat in the same dish. To make this kosher, you can use tamari in lieu of fish sauce for extra umami flavor in the broth.

mbphosideview.jpg
In Dinner, Lunch, Holiday Tags pho, matzo ball, matzah ball, matzah ball pho, soup, jewish food, kosher food, dinner
Comment
allthreedishes.jpg

Recipes for Tu B'av - for .alma magazine

August 3, 2017

My article with recipes for Tu B'av (the Jewish Day of Love) is up on .alma right now!

Below is the dish that I can't stop eating right now. It's more of a recommendation than a recipe - which is my favorite kind of dish to make. And is there anything better than tomatoes in August? They help me get through the dog days of summer here in Los Angeles. You need so little to make them good. And in my humble opinion, beautiful sweet tomatoes, heavily salted, on crisp good bread with excellent butter is incredibly romantic. Enjoy!

Tomato Thyme Toasts

Serves 8-10

  • Baguette or small loaf of good crusty bread, cut into ¾” slices
  • 2 lbs. of your favorite tomatoes
  • 6-7 fresh thyme sprigs, leaves removed from stem
  • Butter (splurge on some good stuff)
  • Maldon salt or kosher salt, to taste
  • Good extra virgin olive oil, to taste

Preheat the oven to 375°F.

Slice the tomatoes into rounds, just under ½” thick. Lightly salt the tomato slices. The salt will start to soften the tomatoes and season them all the way through.

Place the bread slices on a baking sheet. Drizzle lightly with olive oil. Bake the bread for 6-8 minutes, or until just toasted and beginning to brown on the edges. Once the bread is toasted, spread butter onto each piece. This dish is all about layering of fats and salt with the tomatoes.

Top the toasts with the tomato slices. Top the tomato slices with thyme leaves. Drizzle with a little more olive oil (for a little more oomph). Sprinkle Maldon salt over everything – this will add a nice salty crunch.

You can bake the toasts ahead of time and assemble them with tomatoes when you’re ready to serve, the bread doesn’t have to be hot, and the tomatoes will mellow out the bread’s crunch.

______________________________________________________________________

In Lunch, Holiday, Appetizer Tags jewish holiday, jewish food, kosher, tu b'av, holiday, holiday food, romantic food, tomato toast
Comment

Syrniki (Farmer's Cheese Pancakes) with Vanilla Strawberry Rhubarb Compote

May 30, 2017

As a child, I would often find my mother or my grandmother standing over the stove making a fresh batch of farmer’s cheese. In a large pot, I’d find a wide open half gallon milk carton sitting in simmering water. With a little lemon juice the milk transformed from liquid to solid. Strained of any excess liquid it would be transferred to the fridge, where there seemed to always be a never-ending supply.

That homemade farmer’s cheese (“tvorog”in Russian) ended up in all kinds of things: blintzes, piroshki, and on its own served as a side at breakfast. It also ended up in a pancake form called syrniki (pronounced: syr-nee-kee). Syrniki can be made with farmer’s cheese, cottage cheese, or quark.“Syr” means cheese in both Russian and Ukrainian, and these cheese pancakes are commonly made in those parts of the world; it’s also the part of the world that my family comes from.

I like to think of syrniki as deconstructed blintzes - all the good parts with less work. The outside of the syrniki have a satisfying crispness that differs from grain-based pancakes. The inside stays creamy and fluffy. They are vaguely reminiscent of the best kind of latke. Syrniki are also perfect vehicles for all manner of sweet things, and I love them topped with strawberry rhubarb compote. The sweetness of the strawberry and tanginess of the rhubarb are the perfect compliments to the creaminess of the pancakes.

If you’re not buying into the concept of cheese pancakes, the strawberry rhubarb compote is great all on its own. It also goes beautifully with a simple scoop of vanilla ice cream, or as a topping on oatmeal, scones, yogurt, or your more “traditional” pancake.

Enjoy!

Syrniki with Vanilla Strawberry Rhubarb Compote

Serves 4


For the syrniki-

  •  1 lb. farmer’s cheese, about 2 cups
  • 2 large eggs
  • 1 tablespoon sugar, or to taste
  • 1 teaspoon pure vanilla extract
  • Big pinch of salt
  • 1 teaspoon baking soda
  • 1 teaspoon oil
  • ½ cup all purpose flour, plus more for dusting
  • Butter or oil, as needed

In a bowl, mash the farmer’s cheese until it is well broken up with a fork. Add the eggs, sugar, vanilla and salt to the cheese, and combine until mostly smooth.

In a small dish, combine the baking soda and oil. The baking soda may bubble slightly. Add the baking soda mixture and the flour to the cheese mixture and stir until well-combined.

Generously dust your work surface with flour. Place one heaping tablespoonful at a time (about ¼ cup) of the batter onto the floured board. Sprinkle more flour over the top of each small mound of batter.

Form the batter into round pancake shapes, about ¾” thick. You can be really generous with the flour;  it will help the pancakes keep their shape in the pan.

Heat a large pan or a griddle over medium-low heat (I like to use cast-iron). Add a few tablespoons of butter or oil to the pan. Place the pancakes in the pan and cook over medium-low until golden brown on each side, about 3-4 minutes per side. Two important notes: do not crowd the pan as the pancakes expand and puff up as they cook, and do not rush the cooking process. Cook the pancakes in batches, adding more butter/oil as needed. Keep the heat pretty low, and allow the pancake to really cook on one side before flipping. Once it is golden brown, it will begin to unstick and will make flipping much easier. If your pancake falls apart a little, have no fear, you can nudge it back into a circular shape with a spatula and continue to cook it.

Serve warm with compote or your favorite pancake toppings.

For the vanilla strawberry rhubarb compote-

  • 1½ lbs. (700 grams) strawberries, hulled and quartered (about 4 cups)  
  • ½ lb. (250 grams) rhubarb, chopped into ½” chunks (about 1½ cups)
  • ¾ cup (165 grams) granulated sugar
  • 1 vanilla bean, split (or substitute with 2 teaspoons vanilla extract)
  • 2 tablespoons fresh lemon juice
  • Pinch of salt

Combine half of the cut strawberries (about 2 cups) with all of the rhubarb and granulated sugar in a pot. Split the vanilla bean, scrape the seeds into the pot and add the pod as well. Add the lemon juice and salt.

Over medium heat, heat the berry mixture and bring it to a boil. You may wonder how the heap of strawberry and rhubarb will become liquid, but in a few moments the juices will be released and no added water will be needed. Once the mixture comes to a boil, lower the heat and simmer until the rhubarb just starts to break down and is tender, about 5 minutes.

Remove the mixture from the heat and stir in the remaining fresh strawberries. Allow the mixture to cool, then transfer to the fridge for at least 1 hour, or overnight. It keeps well in the fridge for a week.

In Dessert, Holiday, Breakfast Tags Syrniki, cheese pancakes, pancakes, strawberry, rhubarb, compote, strawberry rhubarb compote, dessert, breakfast
Comment

Beet Cured Gravlax

February 13, 2017

Making homemade gravlax is easy. It's one of those great recipes that impresses guests, looks beautiful, requires zero cooking, and takes minutes to make. Heads up: while this recipe is easy, you need to prepare it 3 days in advance.

The beets create a lovely deep scarlet color on the top layer of the fish, and they add a very subtle sweet, earthy, flavor. 

I love to serve this thinly sliced on a platter with fresh veggies. Bagels and cream cheese are always welcome accompaniments for cured fish. Enjoy!

Beet Cured Gravlax

  • 3 lb center-cut salmon filet, as thick as possible 

  • 2 medium red beets (about 1 pound), peeled and finely grated

  • 1 large bunch fresh dill, roughly chopped

  • Zest of 1 large orange

  • Zest of 2 lemons

  • 1 cup plus 2 Tablespoons kosher salt 

  • ½ cup granulated sugar

  • ¼ cup freshly cracked pepper

Note: Ideally, your filet is at least 1½-2” thick, and evenly thick across the fish. If you have thinner parts of a large filet, they may be too salty once cured, and you can discard those ends. Make sure all of the bones are removed from the salmon. 

Directions:
In a bowl, combine the grated beets with chopped dill, orange zest, lemon zest, salt, sugar, and pepper. 

Place a large piece of plastic wrap big enough to cover the fish on the bottom of a non-metal dish (pyrex or ceramic). Place half of the beet mixture on the bottom. Place the salmon skin-side down, and then rub the rest of the beet mixture on top. Tightly wrap the salmon in the plastic wrap. Place another pan/dish on top of the salmon and weigh it down (something like canned goods or small weights works well).

Cure for 3-4 days, or until the salmon is significantly firmer to the touch. Each day, flip the salmon over and drain any excess liquid. Once fully cured, scrape off the beet mixture and discard. 

Serve thinly sliced with the accompaniments of your choice. Cured salmon will keep wrapped tightly in the fridge for up to one week. 

In Dinner, Holiday, Lunch, Appetizer Tags salmon, lox, gravlax, bagels, kosher
Comment

Fresh Cherry and Apricot Tart

June 9, 2016

Fresh Cherry & Apricot Tart

Serves 8-10

for the crust-

  • 1½ cups (150g) graham cracker crumbs (about 10 full sheet rectangular graham crackers)
  • 6 tablespoons unsalted butter, melted
  • 2 tablespoons sugar
  • ¼ teaspoon salt

for the filling-

  • 1 8 oz. bar (225g) cream cheese, at room temperature
  • ¼ cup sugar
  • ½ cup heavy cream
  • ¼ cup sour cream
  • ½ a vanilla bean, seeds scraped out (or 2 teaspoons good quality vanilla extract)
  • 3 tablespoons Luxardo or Kirsch (optional)

for the fruit topping-

  • 1 lb. (450g) cherries, pitted (thawed if frozen)
  • 2 medium apricots, pitted and sliced thin (thawed if frozen)
  • ½ a vanilla bean, seeds scraped out (or 1 teaspoon vanilla extract)
  • 2 tablespoons sugar, or to taste
  • 2 tablespoons Luxardo or Kirsch (optional)
  • 2 teaspoons fresh lemon juice

for the crust-

Preheat the oven to 350°F.

Generously grease a 10”-12” tart pan, or you can use a pie dish or something similar. Line the bottom of the pan with parchment paper, and grease the top of the paper.

Using a food processor, or a sealable bag and a rolling pin, crush the graham crackers until they resemble a coarse flour. In the food processor or in a bowl, add the melted butter, sugar, and salt and pulse (or mix) until just combined. Press the mixture into the greased pan. You can press and smooth the crust evenly by using the back of a flat glass or measuring cup.

Bake for 10-15 minutes, or until firm and golden brown. Allow to fully cool; the crust can be made up to a day in advance. Once cooled cover and reserve.

for the filling-

Using an electric stand or handheld mixer, cream together the room temperature cream cheese with the sugar. Add the sour cream, heavy cream, vanilla, and Luxardo (if using) and beat until it is completely smooth and slightly airy. Make sure to periodically scrape the sides and bottom of the bowl to ensure there are no lumps in the mixture.

Pour the filling into the cooled crust. Even out the filling in the crust with an offset spatula or back of a spoon. Refrigerate for at least one hour or overnight to firm up.

For the fruit topping-

At least one hour or more before serving, prepare the fruit topping for the tart.

Pit the cherries using a cherry pitter, or by slicing the cherries in half and removing the pits. Halve and pit the apricots, and slice thin lengthwise. If using frozen fruit, make sure it is fully thawed.

In a bowl, combine the cherries and apricots with the vanilla bean, sugar, Luxardo, and lemon juice. Toss gently and allow the fruit to macerate.

Top the chilled tart with the fruit and serve.


Any leftover tart can be stored covered in the fridge; it will still be delicious the next day.

In Holiday, Dessert Tags Shavuot, Jewish Holiday, Cherry, Rainier Cherry, Apricot, Dessert, Cheesecake, No bake Cheesecake
Comment
Photo by Eric Slatkin

Photo by Eric Slatkin

Mexican Inspired Matzo Brei

April 19, 2016

Matzo Brei is easily one of my favorite types of Passover food tied only with matzo pizza (because pizza anything is the best). 

There are endless variations on matzo soaked in egg and cooked in fat (ideally butter). This is my favorite version: it's reminiscent of Huevos Rancheros or even a good Chilaquiles. The crispy buttery matzo combines perfectly with a little heat from the sauce, creamy avocado, and fresh cilantro. 

Ranchero sauce is made of chilis, peppers, and aromatics that are cooked and blended together, but you can also find many good pre-made Ranchero salsas at the market. It can also be substitutes with almost any another kind of chili based sauce that you prefer. 

Whether you make the matzo brei savory, sweet, or spicy, I've learned that one thing that is critical for good brei is a generous amount of butter or oil. Without a good amount of fat, the matzo can become dry and brittle. With fat the matzo is creamer and gets crisped and golden on its edges.

This recipe is featured in our Passover Assembly Line series! Video below.

Chag Sameach!

Mexican Matzo Brei

Serves 2-4

for the matzo brei-

  • 4 matzos
  • 4 large eggs
  • 2-3 tablespoons heavy cream
  • 1 tablespoon ranchero salsa (homemade or store bought)
  • ½ teaspoon salt
  • ½ teaspoon ground cumin
  • ½ teaspoon ground coriander
  • ¼ teaspoon chili powder
  • 4 tablespoons butter

for the toppings-

  • 1 avocado, cut into thin slices
  • 2 scallions, sliced thin
  • ½ cup cilantro leaves
  • sour cream, to taste
  • hot sauce, to taste

Start by breaking up your matzo into large chunks into a sieve or colander. It’s ok if the matzo pieces are uneven. Rinse the matzo under cold water until dampened and just softened, about 10-15 seconds.

In a large bowl, whisk the eggs, cream, ranchero salsa, spices, and salt together. Add the soaked matzo to the bowl, and stir until the matzo is coated in the egg mixture.

Heat a large nonstick or well-seasoned cast-iron skillet over medium heat. Add the butter to the pan. Once the butter has fully melted, add the matzo mixture to the pan in an even layer. Allow the matzo to cook and brown on one side for  2-3 minutes. Flip the matzo pieces over and cook them on the other side until they are nicely browned as well, another 2-3 minutes.

Transfer to a large serving platter or individual plates. Top with sliced avocado, fresh scallion, cilantro, and sour cream and hot sauce if desired. Serve immediately.

In Holiday, Breakfast, Lunch Tags Passover, pesach, matzo brei, matzah brei, matzo, mexican, mexican jewish, jewish food, vegetarian
Comment
Photo by Eric Slatkin

Photo by Eric Slatkin

Deep Fried Matzo Balls

April 12, 2016

Why do matzo balls need to be confined to soup? In the spirit of freedom, these matzo balls are let go from their usual broth home, and instead,they're dunked into hot oil, fried until golden, and served with a spicy herbaceous schug dip.


These matzo balls are more hush puppy than airy donut. You have to expect denseness with matzo meal. Once you get over the absence of soup, and the slightly unexpected texture, you find yourself halfway through a second matzo ball... they are delicious and addictive.


Schug is a spicy cilantro and chili sauce, that is commonly found throughout the Middle East. I love the recipe from Zahav, by Michael Solomonov (brought to my attention by friend and collaborator Ellie Bowman), but there are many other recipes out there. You can often even pick up this stuff pre-made at your favorite Israeli restaurant or Middle Eastern market. 

And we've been putting these recipes into motion over at the Assembly Line.


Deep Fried Matzo Balls with Yogurt Schug Dip

for the matzo balls-

  • 1 cup matzo meal
  • 1 teaspoon kosher salt
  • 1 teaspoon baking powder
  • ½ teaspoon baking soda
  • 1 teaspoon garlic powder
  • 1 teaspoon sweet paprika
  • ½ teaspoon ground cumin
  • 4 large eggs, beaten
  • ¼ cup oil schmaltz or oil (vegetable or safflower)
  • vegetable oil, as needed for frying

for the dip-

  • 1 cup plain Greek yogurt
  • 1-2 tablespoons Schug (spicy herb sauce*)
  • Salt and pepper, to taste

Combine the matzo meal, salt, baking powder, and baking soda together in a large bowl. To the matzo meal mixture add 4 beaten eggs, ¼ cup of oil, and spices. Stir until just combined. Chill the dough for at least 1 hour. Once chilled, formed the dough into even-sized balls.

Fill a Dutch oven or heavy bottomed pot with 3 inches of oil. Heat until hot, about 350°-375°F when tested with a candy thermometer.

Drop the matzo balls into the oil in batches. Be careful not to crowd the pot, add 6-8 matzo balls at a time. Fry until golden brown on all sides.

Once cooked transfer to a sheet pan lined with paper towels and fry the next batch. You can can keep them warm in a warm oven if necessary. The fried matzo balls are best served hot and fresh.

for the dip-

In a bowl, combine the yogurt and schug. Mix until incorporated.

*Schug (also spelled Zhug or Skhug)

Schug is a spicy green sauce that originated in Yemen and is commonly eaten across the Middle East. It can be purchased in some Middle Eastern markets, or from Israeli restaurants. Michael Solomonov has a great recipe in his cookbook, Zahav:

Schug

  • 20 serrano chiles, stems removed
  • 1 cup parsley leaves
  • 1 cup cilantro leaves
  • 4 garlic cloves
  • 1 tablespoon kosher salt
  • 1 tablespoon ground cardamom
  • 1 tablespoons ground coriander
  • 2 tablespoons lemon juice
  • 1 cup canola oil

In a food processor, combine all of the ingredients except the oil. Once processed into a coarse paste, transfer to a bowl. Whisk in the oil. The sauce will appear chunky, not smooth. Store in a container in the fridge for up to 1 month.

In Holiday, Appetizer Tags Passover, Matzo Balls, Fried Matzo Balls, Pesach, Chag, appetizer, matzah, matzo
Comment

Savory Hamantaschen - Leek, Fig and Cambozola Cheese

March 20, 2016

Hamantaschen. Triangular. Filled with stuff. Made for Purim. Meant to resemble Book of Esther’s Haman. Also maybe meant to resemble aforementioned defeated enemy’s ears (in Israel Hamantaschen are called “Oznei Haman” - translation from Hebrew: Haman’s ears). Whatever they are, they are defined by their shape. There are endless variations on their dough, their size, their flavors, and their fillings.

This year, like many other years, I continue to explore the possibilities of what Hamantaschen can be. I experiment with the dough. Egg or no egg? Butter or margarine? Sweet or savory? Traditional fillings or crazy fillings? I'm still seeking my perfect version of a sweet, not-too floury dough , but I am increasingly happy to eat a pastry that is a little more savory. While it has a note of sweetness, this hamantaschen is more appetizer than dessert. The dough is the same used in flaky pie dough or crostatas, the filing has leeks, fig preserves and Cambazola cheese. The result is salty, sweet, and rich.

As a cautionary note, the impulse may be to fill these generously with your filling; exert restraint, it will seem like too little but any more will cause the cookie to overflow or taste too filling-heavy. Another cautionary note, make sure to really pinch shut the edges of each hamantaschen. These tricky guys like to unravel in the oven any chance they get.

Savory Leek, Fig, and Cambozola Hamantaschen

Makes approximately 20

for the dough-

  • 2½ cups all purpose flour

  • 2 tablespoons sugar

  • 1 teaspoon kosher salt

  • 1 cup unsalted butter (2 sticks), cold

  • 2 teaspoons apple cider vinegar, cold

  • 6-8 tablespoons ice cold water

  • 1 egg, beaten for the egg wash

  • freshly ground black pepper, to taste

for the filling-

  • 2 large leeks, diced

  • 2 tablespoons unsalted butter

  • ½ teaspoon kosher salt

  • ¼-½ teaspoon fig preserves per hamantaschen

  • ½ teaspoon Cambozola or creamy blue cheese per hamantaschen

for the dough-

In a food processor, add the flour, sugar and salt. Pulse a few times. Add the cold cubed butter. Pulse until the mixture forms pea-sized crumbs of butter and flour. (If doing by hand, using a pastry cutter combine the dry ingredients with the butter until pea-sized balls form).

To the food processor add the apple cider vinegar, and the ice water a few tablespoons at a time. Pulse until the mixture comes together in a ball. If the dough doesn’t stick together easily between your fingers, add another tablespoon of water. When it is done, the dough will be slightly crumbly but will easily form into a ball. Form the finished dough into a flattened disc, wrap in plastic and refrigerated for 2-3 hours or overnight.

for the filling-

Clean and dice the leeks. To a skillet over medium low heat, add the butter. Add the leeks to the pan and season them with salt. Sauté until the leeks are soft and starting to caramelize (turning golden but not crispy and browned), about 10-15 minutes

to assemble your hamantaschen-

Preheat the oven to 375°F. Line a baking sheet with parchment paper.

Flour your surface and rolling pin lightly. Roll out the dough until about ¼-inch thick. Using a 3-inch biscuit, cookie cutter, or even a drinking glass, cut out rounds from the dough. Fill each round with ½ a teaspoon of the leek mixture, ½ a teaspoon of fig preserves, and ½ a teaspoon of cambozola blue cheese. Fold over one third of the round onto the filling, fold over a second third, and fold over the last third. With each third, gently pinch and seal the edges of the dough firmly together, forming a well-secured triangle-shaped pastry. Transfer the hamantaschen onto the parchment-lined baking sheet. Make sure there is at least an inch between each pastry. You can re-roll the remaining dough and form more hamantaschen.

In a small dish, beat an egg. With a pastry brush, brush the top of the dough with the egg wash. Top with freshly ground black pepper if desired.

Bake the hamantaschen for 12-14 minutes, or until golden brown.

Once baked, transfer to a rack to fully cool. Serve at room temperature. The hamantaschen can be stored in an air-tight container for several days, if they last that long.

In Appetizer, Holiday Tags Hamantashen, hamantaschen, purim, dessert, savory, savory pastry, vegetarian, leek, fig, cambozola, blue cheese
Comment
← Newer Posts

Latest

Featured
IMG_3606.jpeg
May 27, 2025
Sheet-pan Lemony Potatoes and Baby Artichokes
May 27, 2025
May 27, 2025
IMG_3784.jpeg
May 12, 2025
The Secret to Crispy Tofu Every Time + A Sweet & Spicy Gochujang Glaze
May 12, 2025
May 12, 2025
snackingcakeslices copy.jpg
Apr 11, 2025
One-bowl blueberry lemon snacking cake (gluten-free/grain-free)
Apr 11, 2025
Apr 11, 2025
IMG_5075.JPG
Feb 24, 2025
Manti (meat dumplings) in brothy tomato sauce
Feb 24, 2025
Feb 24, 2025
matzoballsontablecloth.jpg
Jan 20, 2025
Golden Chicken Soup with Matzo Balls
Jan 20, 2025
Jan 20, 2025
harissatofuandchickpeas.jpg
Dec 18, 2024
Sheet-Pan Crispy Harissa Tofu, Chickpeas, and Broccolini
Dec 18, 2024
Dec 18, 2024
caracaracake.jpg
Dec 4, 2024
Cara Cara Orange Olive Oil Cake
Dec 4, 2024
Dec 4, 2024
IMG_0640.JPG
Nov 6, 2024
Easy Roast Turkey for Thanksgiving
Nov 6, 2024
Nov 6, 2024
IMG_3282.JPG
Sep 19, 2024
Apple and Honey Dumplings
Sep 19, 2024
Sep 19, 2024
IMG_7173.jpeg
Jul 31, 2024
Galette with any kind of fruit
Jul 31, 2024
Jul 31, 2024
IMG_4004.jpeg
May 9, 2024
Cheddar Cheese Coin Crackers
May 9, 2024
May 9, 2024
DSC02602.JPG
May 2, 2024
Asparagus, Gruyere & Swiss Tart
May 2, 2024
May 2, 2024
whitebeansoupwithzhug.JPG
Mar 11, 2024
Yemenite White Bean Soup with Zhoug
Mar 11, 2024
Mar 11, 2024
DSC02301 (1).jpeg
Jan 24, 2024
Celery, kohlrabi, date salad with toasted almond and sesame
Jan 24, 2024
Jan 24, 2024
DSC02138.jpg
Dec 3, 2023
Sweet potato latkes with cranberry salsa
Dec 3, 2023
Dec 3, 2023
kompot_main photo.JPG
Jul 11, 2023
Ukrainian Summer Fruit Kompot
Jul 11, 2023
Jul 11, 2023
cherryvareniki mainphoto.jpg
Jun 15, 2023
Cherry Vareniki
Jun 15, 2023
Jun 15, 2023
tzimmescaketopdown.jpg
Apr 19, 2023
One-Bowl Tzimmes Cake
Apr 19, 2023
Apr 19, 2023

Sign up with your name and email address to join my mailing list.

I respect your privacy.

Thank you!

Privacy Policy can be found here

All photos copyright of Sonya Sanford unless otherwise indicated