• Welcome
  • Book
  • Classes
    • Recipes
    • Index
  • Writing
  • Press
  • Shop
  • Contact
Menu

Sonya Michelle Sanford

  • Welcome
  • Book
  • Classes
  • Recipes
    • Recipes
    • Index
  • Writing
  • Press
  • Shop
  • Contact
stuffedcabbage.jpg

Golubtsi - Classic Stuffed Cabbage

March 14, 2021

In our family, we preferred our golubtsi (stuffed cabbage) with chicken, and my grandmother taught me to use Savoy cabbage. Savoy’s leaves are softer and more pliable than standard green cabbage, with a subtle sweet flavor. This recipe is meant to merely be a guide; add more or less rice, use the meat you prefer, add seasonings or herbs you love, and adjust the sauce to your own liking. This dish can be easily be made in advance and reheated before serving, and it also freezes well. I like to serve mine with a big salad, sliced toasted crusty bread, or fresh challah.

“Golubtsi” - Stuffed Cabbage

Ingredients:

For the sauce-

  • 28 oz tomato sauce/purée + equal parts water

  • 1 onion, chopped fine

  • 3-4 cloves garlic, minced fine

  • 1 small apple, diced fine

  • 2 Tbsps tomato paste

  • 1 bay leaf

  • 2-3 Tbsps maple/agave syrup, or 1 tablespoon sugar, or to taste

  • Salt and pepper, to taste

For the stuffed cabbage-

  • 1 large savoy cabbage

  • 1½ lbs ground chicken, turkey, or beef

  • ⅔ cups basmati rice, rinsed

  • ½ medium onion, diced fine

  • 1 large egg

  • 2¼  tsps Diamond kosher salt

  • 1-2 tsps garlic powder, or 1 clove garlic minced very fine


Directions:

For the sauce- In a large pot or Dutch oven, sauté the onions and garlic until softened and aromatic, about 5 minutes. Add the apple, and sauté for another 2-3 minutes or until slightly softened. Add tomato paste and stir and cook for 1 minute. Add the tomato sauce, and an equal amount of water, bay leaf, salt, pepper, and sweetener of choice (if using). Your sauce should start out thin and liquidy; it will thicken as it cooks. Bring the sauce to a boil, and simmer on low for at least 30 minutes, or while you prepare the cabbage and filling. Taste the sauce before adding the stuffed cabbage, and adjust if necessary for salt or sweetness. Dilute with more water if needed.  

For the cabbage- Bring a large pot of water to a boil. Salt the water generously, and then add the cabbage to the water. Boil the cabbage for 2-3 minutes. Then remove it and allow it to cool. 

While the cabbage is cooling, add the rinsed rice to the same pot of salted boiling water. Let the rice boil for 8-10 minutes until partially cooked. Drain, and allow to cool and dry. 

Make the filling: combine the ground meat, cooled and drained rice, diced onion, egg, salt, and garlic powder. 

To assemble and cook: Separate the cabbage leaves, trimming any thick part of the stem. If your cabbage isn’t separating easily, place it back in boiling water for an additional 2-3 minutes. 

Place a leaf of cabbage down flat, fill it with approximately ¼-cup of filling near the base of the leaf. Fold the base of the leaf over the filling, fold the sides of the leaf towards the center, and then roll until the cabbage is formed into a burrito-like package. Place seam-side down into the pot; cabbage rolls can be stacked on top of each other as long as they are all submerged in the sauce. 

Cover the pot, and let the cabbage simmer for 45-60 minutes on low heat, or until tender and cooked through. Add more water if the sauce appears too thick at any point. The sauce should be easily spoonable over the cabbage.

Stuffed cabbage can be reheated in a covered baking dish in the oven at 350°F, a covered pot on the stove , or in a microwave. 

cookedstuffedcabbage.jpg
In Dinner, Holiday Tags golubtsi, stuffed cabbage, chicken stuffed cabbage, russina food, Jewish food, eastern european food, grandmother's cooking, old world food, Ukrainian food, cabbage
Comment
Pampuskhy1.jpg

Pampushky - Ukrainian Garlic Bread Rolls

February 28, 2021

Pampushky are fluffy, soft, Ukrainian garlic rolls. Ukraine was known as the “breadbasket” of the Soviet Union, and both garlic and bread are staples of the cuisine. These rolls are traditionally served alongside borscht; the garlic’s sharpness compliments the sweetness of borscht’s beets. Garlic + bread is such a common side to borscht, that my own grandparents would often simply eat slices of brown bread and whole raw cloves of garlic with their soup. 

I was first inspired to make pampushky years ago when I came across a recipe in Mamushka, Olia Hercules’ exceptional Ukrainian cookbook. This recipe differs slightly, but the idea is the same for all pampushky: make pillowy soft buns, and top them with a mixture of oil and copious amounts of freshly minced or grated raw garlic. I prefer sunflower oil for this recipe, which is traditionally used in Ukrainian cooking. The moment the rolls come out of the oven, generously slather them with the garlic and oil mixture. The heat of the bread cooks the garlic just enough to slightly mellow its flavor. Fresh parsley and dill are also added to the garlic oil, which offers a bright herbaceousness to the spicy heat of the garlic. Make no mistake, these rolls are adamantly for garlic lovers. 

Pampushky are best served warm, either soon after coming out of the oven, or reheated just before serving. As you set the rolls on the table, make sure to announce that you are serving  “pampushky.” Saying the word out loud is part of the joy of making these rolls. 

Ingredients-

  • For the dough:

  • 1 cup (250 ml) milk 

  • 2¼ tsps (1 packet) active dry yeast

  • 2 Tbsps sugar

  • 2 Tbsps oil (sunflower, avocado, or olive) 

  • 3 cups (380 g) all-purpose flour

  • 2 tsps salt

  • 1 egg, beaten

For the garlic oil:

  • 3 Tbsps oil (sunflower, avocado, or olive) 

  • 3-4 garlic cloves

  • 1 Tbsp chopped fresh dill

  • 1 Tbsp chopped fresh Italian parsley 

  • Flake salt (optional)

Directions-

Warm the milk until it is between 80-100°F, and just warm to the touch. Add the milk to the bowl of a stand mixer fitted with a dough hook attachment, or add the milk to a large bowl if kneading by hand. Add the sugar to the milk, then sprinkle the yeast on top. Whisk the mixture and allow it to activate and become foamy for about 5-10 minutes. Once the yeast is activated, add the oil to the milk mixture, then add the flour and salt. If using a stand mixer, start mixing the dough on the lowest setting. Once the dough starts to form a ball, increase the speed to medium and knead for 6-8 minutes. Alternatively, knead for 10-12 minutes by hand. The dough is done when it is elastic, glossy, soft, and easily comes away from the sides of the bowl/surface. Add the dough to a lightly oiled bowl, and cover with a clean damp kitchen towel. Let the dough rise for 1-1½ hours, or until doubled in size. 

Once the dough has risen and doubled in size, punch it down to remove the air, and transfer it to a clean surface. Form the dough into a rectangle, and then divide it into 8 equal-sized pieces; weigh each one to be exact. Form each piece into a ball by pinching the edges inward, and then on a flat surface, roll the dough into a ball shape.

Preheat the oven to 350°F. Lightly grease a 9” round or square baking dish, preferably metal as opposed to glass or ceramic. Beat the egg for the egg wash. Place each ball of dough in the baking dish, with an equal distance between each ball. Allow the dough to rise a second time for 30 minutes, or until the rolls have puffed up and filled the pan. Brush the tops of the dough with the egg wash and bake for 25-30 minutes, or until deep golden brown.

While the rolls bake, make the garlic oil mixture. Finely mince the garlic using a garlic press or a Microplane. Combine the oil, garlic, chopped dill, and chopped parsley together. Brush the garlic-herb mixture over the rolls immediately after they come out of the oven. Allow the rolls to cool for 15 minutes before serving. Pampushky can also be served at room temperature or reheated.

oneplated_pampushky.jpg
In Vegetarian, Dinner, Holiday, Lunch, Snack Tags Pampushky, Pampushki, Garlic rolls, Garlic Bread Rolls, Ukrainian Bread Rolls, Ukrainian food, Bread rolls, bread, home baking
2 Comments
ploveinDutchoven.jpg

Plov, One-pot chicken and rice

January 7, 2021

 Plov is a rice pilaf-style dish that became popular in the Soviet Union by way of Uzbekistan. In truth, this dish’s origin has a longer story, and one with a Jewish connection. The earliest version of rice pilaf is documented by a 10th-century Persian scholar, and Persian cuisine is well known for its glorious rice dishes and tahdig. Plov can also look like pilau in the UK, pulao in India, and even paella in Spain. Ultimately, there are countless cultures that have some version of a one-pot rice and meat dish. So, what makes plov different?

Plov’s popularity in Russia can be traced back to at least the time of Alexander the Great. Upon returning from Central Asia to Macedonia, his soldiers were said to have brought back plov as one of their new favorite foods. The existence of this dish in Central Asia has a distinct tie to the Jewish community there. The Bukharian Jews of Central Asia are Mizrahi Jews whose lineage goes back to the time of King David, and Ancient Persia. During the reign of Persia’s Cyrus the Great, Jews made their way to Central Asia and formed a community where they eventually spoke a dialect of Persian called Bukhori. Central Asian versions of plov, particularly the Uzbeki variety, were later popularized across all Soviet republics during the time of the Soviet Union.

Soviet-style plov is most commonly made with lamb as its meat, carrots as its vegetable, and is typically spiced with cumin and coriander. However, you will find a wide range of plov made with different kinds of meat or poultry, spices, and even the addition of dried fruits or nuts. I prefer to keep plov simple with traditional flavors. I use chicken thighs for their ease of availability and affordability, and I add loads of carrots and onions, which seem to magically disappear into the rice once cooked. Garlic, bay, cumin, and coriander perfume this plov.

This dish is a one-pot meal. Each element takes a little time, but once all of the ingredients are prepped, it comes together quickly and then gets popped into the oven to finish cooking. It reheats and freezes well, and is hearty and filling. Plov is the kind of comfort food that can be made as much for a special occasion as for a warming weekend dinner.

Chicken Plov

Serves 4-6 

Ingredients:

  • 2 cups Basmati or Jasmine rice

  • 3¼ cups boiling chicken stock or water

  • 1½ lbs boneless skinless chicken thighs

  • 3-4 (½ lb.) carrots

  • 2 medium small yellow onions

  • 2 small heads of garlic

  • 2-3 bay leaves (ideally fresh)

  • 1½ teaspoons ground cumin

  • 1 teaspoon ground coriander

  • 1 teaspoon paprika

  • ½ teaspoon aleppo pepper or pepper flake (optional)

  • salt and pepper

  • Oil, for cooking

Directions:

Preheat the oven to 350°F.

Rinse the rice well, then place it in a bowl of cold water to soak as you prepare the other ingredients. This helps remove excess starch and makes for fluffy rice.

Cut the chicken thighs into 2”-3” pieces, and salt with 1½ teaspoons of kosher salt and freshly ground pepper. Reserve.

Peel and julienne (matchstick cut) the carrots. Alternatively, you can use the medium holes of a box grater, or the shredder attachment on a food processor to grate the carrot. Peel and halve the onions, then slice them thin. Halve the garlic heads crosswise and reserve.

 On medium-high heat, generously drizzle oil into the bottom of a large Dutch oven, or a wide heavy-bottomed deep skillet (at least 12” wide). If you do not have either, you can brown the chicken and vegetables in any large skillet, and then transfer everything to a large ceramic or pyrex casserole dish. Brown the seasoned chicken thigh pieces on each side, then remove and reserve.

Lower the heat to medium, and into the same Dutch oven or skillet, add the onions and carrots. Generously season with salt and pepper, and sauté for 5-6 minutes or until softened. Add the cumin, coriander, paprika, and aleppo/chili pepper to the onions and carrots and sauté for an additional minute. Drain the rice that has been soaking, and then add it to the carrots and spice mixture. Sauté and stir for 1-2 more minutes, until the rice is well coated in the mixture. At this point, if you are using a casserole dish, transfer the mixture to the dish. If you are using a Dutch oven or deep skillet, continue the next steps in the same pot.

Add the chicken to the rice mixture, then nestle the garlic heads and bay leaves into the rice. Pour the boiling stock or water over the rice and chicken mixture (the liquid must be at a boil when added in order to cook the rice properly). Make sure everything is covered by at least ¼” of liquid. If not, add an additional ¼ cup of boiling water or stock.

Cover the Dutch oven or skillet with a lid, or cover the casserole dish tightly with foil. Place in the oven for 50 minutes. Remove from the oven, and leave the plov covered for an additional 10 minutes.

Once it has rested, fluff the rice just before serving. There may be delicious browned crispy bits of rice on the edges. If your rice still feels too wet, you can cover it again and put it back in the oven for an additional 10-15 minutes to cook further.

platedplov.jpg
In Dinner, Lunch Tags plov, russian food, uzbeki food, bhukarian, chicken and rice, one-pot meal, one-pot chicken and rice, chicken, rice, pilaf
2 Comments

Tefteli - Russian Meatballs

December 20, 2018

As published for The Nosher 

For the first five years of my life, we lived in the apartment next door to my grandparents. I may have only been a toddler, but I still have vivid memories of being in that home with its many house plants overflowing in their pots, tchotchkes and art from the former Soviet Union. What I remember most about being at my grandparents’ home was the food. Often, there was a pot of something simmering on the stove. On the best days, that pot was filled with tefteli, otherwise known as Russian meatballs. I can still see myself sitting at my grandmother’s table in front of a steaming bowl of tefteli, eagerly waiting for them to cool down so I could start eating.

 What makes Russian meatballs different from other kinds? While tefteli come in all types of variations and preparations depending on your own family’s tradition, one of their defining features is that they’re typically made with rice. It’s likely that rice was first incorporated into the dish as a means to stretch the meat, but it also adds a great texture and flavor. Unlike the Italian kind, most Russian meatballs don’t use breadcrumbs, or much by way of herbs or spice. Some folks make them with beef, some with chicken or turkey. The non-kosher versions are often made with pork, and are cooked in a creamy tomato sauce. Some cooks dust the meatballs in flour and then brown them before adding them to the sauce. Some bake them in the oven. Some make a sauce that ends up so thick it is almost shakshuka-like. Usually, shredded carrot is added to the base of the tomato sauce, adding sweetness. Tefteli are also meant to be eaten on their own as a main course, and they are frequently served with creamy mashed potatoes, but I also love them with a side of polenta, or even with just a slice of good crusty bread.

 Every time I make tefteli I try to replicate what my grandmother made for me. Yes, I’m biased, but her tefetli are the best I’ve ever tried. This recipe is fairly simple in terms of its ingredients and steps, but the key to her tefteli’s success is one step that you can’t rush or skip: caramelizing the onions. Caramelizing onions was my grandmother’s go-to flavor builder. When onions get golden and jammy from cooking slowly in a little fat, they add sweetness and umami to any dish. The rest of this recipe mainly involves adding things to a large pot. Leftover rice is great for the meatball mixture, but if you don’t have some on hand, I find the timing works out well if you cook the rice while you’re caramelizing the onions and making the sauce. I prefer to use dark meat ground chicken for this, but you can definitely make this with turkey or beef.

 This is the kind of dish that rarely gets a written recipe. I’ve given you specifics, but deviating from what is suggested will only make this better. Taste and modify your tefteli to your own liking. For instance, my mom actually dislikes rice in tefteli, so she adds breadcrumbs or matzo meal instead. I like to add chili flake for subtle heat, but that can be completely omitted. I find that these are perfect when they’re on the larger-side, but if you like smaller-sized meatballs go for that. In any form, these are best made in a big batch so that they can be shared with loved ones, and so that they can fill your home with warmth and the smell of good simple food.

Tefteli - Russian Meatballs

Serves 4-6

For the sauce-

  • 1 large yellow onion, diced small

  • 3 Tablespoons oil (sunflower, avocado, or canola)

  • 1 large carrot, peeled and shredded

  • 2-3 cloves garlic, minced fine

  • 2 Tablespoons tomato paste

  • 1 (28 oz) can crushed tomatoes

  • 2 (15 oz) cans plain tomato sauce/pureed tomatoes

  • 2 Tablespoons maple syrup or 1 Tablespoon sugar, or to taste

  • 2 teaspoons dried oregano or thyme

  • Pinch of red pepper flake, or to taste

  • 1 (28 oz) can filled with water (about 3.5 cups)

  • Salt and pepper, to taste


For the meatballs-

  • 2 lbs dark meat ground chicken or turkey

  • 2 cups cooked Basmati or Jasmine rice (about ¾ cup uncooked)

  • 1 large onion, minced very fine

  • 1 large clove of garlic, finely grated or minced

  • 1 large egg

  • 2½ teaspoons kosher salt (Diamond brand)

  • Ground pepper, to taste

  • Chopped flat leaf parsley, for garnish


For the sauce-

Add oil to a Dutch oven or large heavy-bottomed pot over medium heat. Add the diced onion to the pot. Allow the onion to soften and caramelize until golden, stirring occasionally, about 15-20 minutes (you can go for longer if you want the onion to caramelize more deeply). Add grated carrot, minced garlic, and a big pinch of salt to the pot. Stir and sauté for 3-4 minutes, or until the carrot has softened and the garlic is aromatic. Add the tomato paste and stir until everything is coated, about 1 minute. Add the crushed tomato, tomato sauce, maple syrup, herbs and chili flake to the pot. Fill the empty 28 oz crushed tomato can with water and add that water to the pot. Taste and season with salt and pepper. Let the mixture come up to a simmer.

For the meatballs-

In a large bowl, combine the ground chicken, cooked rice, and onion. I like to use a microplane to grate my garlic straight into the bowl. Add the salt, pepper, and egg. Combine everything together until well incorporated, but make sure not to overmix or the meat can become tough. Clean hands work best for this. Before I cook the meatballs, I like to take a spoonful of the mixture and cook it in a small pan to taste for seasoning. I add more salt or pepper accordingly.

meatballfilling.JPG

Form the ground meat mixture into even-sized balls. I prefer my tefteli slightly larger than a golf ball, but make them according to your own preferences. Drop the formed meatballs into the simmering sauce. Make sure the sauce returns to a simmer, then lower the heat and partially cover the pot with a lid. Simmer the tefteli for 35-45 minutes or until cooked through. If you find the sauce is too thick you can add more water. If you want the sauce less thick, you can simmer it for longer to reduce and thicken.

Serve the meatballs with a generous ladle of sauce, topped with chopped fresh parsley alongside mashed potatoes, your favorite side, or slices of good bread. 

Meatballs can be made several days in advance, and they freeze and reheat well.

biteoftefteli.jpg
In Dinner, Lunch Tags Rusian food, Meatballs, Russian Meatballs, Tefteli, Turkey meatballs, jewish food
Comment
pomjuicechicken.jpg

Instant Pot Georgian Pomegranate Chicken

September 5, 2018

For the full article, head over to The Nosher!

As documented by the queen of Jewish cooking, Joan Nathan, and by Georgian food guru, Carla Capalbo, the Georgian Jewish community traditionally makes chicken cooked in pomegranate juice for Rosh Hashanah. It’s a perfect recipe for the High Holidays: sweet, tart, flavorful, and eye-catching. This recipe is an adaptation from multiple recipes for this dish, but in any variation the chicken is braised in a generously-spiced, fruity pomegranate juice-based broth, and then topped with fresh red jewel-like pomegranate kernals.

The pomegranate juice adds expected sweetness, but there’s also an assertive and awakening tang that comes through, especially with the addition of tamarind and pomegranate molasses. The copious amounts of onion and garlic add deep levels of sweet and savory flavors to the dish. The coriander, hot pepper (not too hot), and thyme play off each other with their respective perfumy-ness, heat, and minty-ness. It is Rosh Hashanah, so a hint of honey makes its way into the pot to remind you of sweetness without being at the forefront of the show. After 15 minutes at high pressure, the chicken barely clings to its bones, and the sauce becomes rich with and fortified by the golden schmaltz left over from browning the chicken. Take the chicken out and let that liquid simmer (still in the Instant Pot), and the mahogany-colored sauce will thicken and become silky and as decedent as a festive meal demands. Once the chicken and sauce are plated, you shower them with the bright green fresh herbs and the glistening ruby red pomegranate. Dark meat works best for this, but you can certainly make it with white meat as well. And like all great holiday dishes, you can make this several days in advance and it only gets better when reheated. It also freezes well, just leave off the fresh garnish until right before serving. And yes, if you really don’t want to cave to culinary social pressure, you can make this recipe the old fashioned way.

Instant Pot Georgian Jewish Chicken in Pomegranate Juice

Serves 6-8 (recipe can be doubled)

  • 12 whole chicken legs, or 6 bone-in thighs + 6 legs (about 4 lbs)
  • Sunflower or avocado oil, as needed
  • 3 medium red onions, halved and sliced thin
  • 4-5 cloves garlic, minced fine
  • 2 teaspoons ground coriander
  • 1½ teaspoons aleppo pepper, or ½ teaspoon red pepper flake, or to taste
  • 1 teaspoon sweet paprika
  • 2 Tablespoons tomato paste
  • 1 cup pomegranate juice
  • 2 Tablespoons pomegranate molasses
  • 2 Tablespoons tamarind paste
  • 1 Tablespoon honey
  • 3 sprigs fresh thyme
  • 1 bay leaf
  • Arils/seeds of 1 whole pomegranate
  • ½ bunch fresh cilantro or parlesy, for garnish
  • Salt and pepper, as needed

Start by generously seasoning your chicken with salt and pepper on both sides.

Turn your Instant Pot or pressure cooker to the sauté setting, which should produce high heat for browning. If needed increase the heat to MORE or according to the manufacturer’s instructions. Once the pot is hot, add a drizzle of oil. Brown each piece of chicken until golden brown, about 3-4 minutes on each side. Cook the chicken in batches so as not to crowd the pot and cause the chicken to steam instead of brown. On the stoevtop, brown the chicken in a large pot or Dutch oven on medium high heat. Once all of the chicken is browned, transfer it from the pot and reserve.

Next, add all of the onions to the same pot so that they can cook in the remaining chicken fat. If your chicken did not release very much oil, and another tablespoon or two of oil to the pot. Season the onions with salt and sauté for 5-6 minutes or until softened and starting to slightly brown. Add the garlic, coriander, and paprika to the pot and sauté for an additional 1-2 minutes, or until fragrant. Add the tomato paste, and stir everything until the onion mixture is well coated in the tomato paste. Nestle the reserved browned chicken back into the pot. Press CANCEL to turn off the sauté function on the pot. Follow the same steps on a stovetop.

Add the pomegranate juice, pomegranate molasses, tamarind paste, honey, thyme and bay to the pot. Place the lid on the Instant Pot, close the pot and seal it. Press the POULTRY or MANUAL setting and set the time to 15 minutes. Let the steam naturally release for 10-15 minutes, and shift the valve to venting if more air needs to be released. On the stovetop, cover the pot and simmer for 30 minutes on medium-low or until the chicken is tender and cooked through.

Press CANCEL, open the lid and transfer the chicken to a platter and lightly cover with foil to keep the chicken warm. Remove the bay leaf and thyme stems. Turn on the SAUTE function again. Allow the sauce to simmer and reduce by half, or until its reached your desired thickness. On the stovetop, turn the heat to medium-high and simmer.

Once the sauce has reduced and thickened, pour the sauce over the chicken. At this point you can keep dish warm in a low oven, or you can cool it and freeze if making in advance.

Just before serving, garnish the chicken with the fresh pomegranate and roughly chopped cilantro or parsley.

In Holiday, Dinner Tags Georgian food, Pomegranate, Pomegranate Chicken, kosher food, Rosh Hashanah, High Holidays, Instant Pot, Instapot
Comment
justwatermelon.jpg

Pickled Watermelon and other "Zakuski"

July 16, 2018

As written for The Nosher

When you are invited to a Russian person’s home you’ll likely enter the dining area to see a table laden with small plates of food. This type of spread is known as zakuski, which translates to “something to bite after.” Zakuski are essentially snacks that are meant to be eaten while drinking shots of vodka or other alcohol. Popular zakuski include smoked fish, cured meats, salads generously dressed with mayonnaise, blini and caviar, marinated mushrooms, and at least one kind of pickle. Pickled cucumber or cornichons are common, but so are all kinds of other pickled vegetables and fruits.

Russians and Slavic people love pickles. Like many great culinary traditions, the practice of pickling and preserving was born out of necessity. The growing season for fresh fruit and vegetables is relatively short and it became essential to preserve the bounty of fresh produce for the dark cold days of winter. Historically, much of the food preservation used salt to pickle and/or ferment as opposed to using vinegar-based brines; this results in a saltier but less sour pickle. Pickled and fermented produce are also valued for their health benefits. Fermented foods can aid digestion and help with good gut bacteria. This is particularly welcome when you’re eating rich and hearty foods. Most importantly, pickles are flavorful. Pickled foods were particularly popular in Jewish communities in Russia and Eastern European, and often because they added bright acidity and strong flavors to complement staple bland foods like bread and potatoes. In fact, Eastern European Jews introduced dill pickles to America during the late 1800’s and early 1900’s when they began arriving in New York.

The practicality of preserving summer food for the winter is clear, but these pickled fruits are equally refreshing on a hot summer day, preferably eaten with a meal outdoors. I’ve picked three of my favorite zakuski recipes to share: pickled sour cherries, watermelon, and peppers. The sour cherries only show up for a short time every year, and I try to get a big bag whenever I see them available. They are great for pie or for compote, but I love them pickled with a little cardamom. They end up tasting like an elevated maraschino cherry - tart, not too sweet, and complex. They’re great in a cocktail, and just as good as a side to BBQ. Pickled watermelon is a classic in Russia, Ukraine, Georgia and other Soviet countries. Russians typically add garlic, bay, and dill to the brine, which makes the watermelon a savory treat. I love to serve it alongside cured meat or grilled sausages, and it also goes well as a pre-meal bite to eat alongside salty snacks served with ice cold vodka (or beer). The pickled peppers are easily my favorite. My grandmother called them “marinated peppers” and they were a staple dish in her home. She served these peppers at the first course of every dinner, and they always managed to stay on the table throughout the meal. I especially loved to have them along with chicken schnitzel and potatoes.

The techniques described in these recipes can be used on just about any kind of produce. The process for the watermelon quick pickle is simple and would work well for tomatoes, cauliflower, green beans, and more. First you make a brine with a combination of salt, sugar, and any aromatics you’d like. You pour the brine over the fruit or vegetables, and then refrigerate. The pickles are ready the next day, but the longer they sit in the fridge, the deeper the flavors are developed. The tangy vinegar based marinade for the peppers would be excellent with mushrooms. And the sweeter brine for the sour cherries would be great with plums or peaches. These pickles last for months stored in the fridge… if you can go that long without eating all of them or sharing them with friends. There’s nothing quite like arriving at a table with many colorful dishes already laid out waiting for you to dig in. It’s an invitation to enjoy, relax, and eat.

threejarswithpickles2.jpg

Pickled Watermelon

  • 1 3-4 lb. watermelon
  • ½ bunch of dill, stems on
  • 4-5 cloves garlic, peeled
  • 3-4 bay leaves (fresh if available)
  • 2 small Serrano chilies (or 1 jalapeno), halved
  • 6 cups filtered water
  • ¼ cup kosher salt
  • ¼ cup sugar
  • 2 tablespoons white or apple cider vinegar
  • 1 Tablespoon peppercorns

Wash the watermelon very well, and then slice into desired pieces. I like mine about ¾-1” thick, and cut into small triangles with the rind still on.

In a large glass jar or ceramic crock big enough to hold the watermelon slices, place the dill, garlic, a few of the bay leaves, and the Serrano chili in the bottom. Layer the cut watermelon on top. If necessary, divide these ingredients among jars, and place the aromatics on the bottom of each jar.

In a medium pot, combine the water, salt, sugar, vinegar and peppercorns. Bring up to a simmer, and heat until the salt and sugar is just dissolved. Pour the liquid over the watermelon in the jar(s). Top with the remaining bay leaves and a little more dill if desired. If the watermelon is floating above the liquid, you can weigh the fruit down by placing a small plate inside the jar with something heavy on top.

Allow the mixture to fully cool, and then refrigerate. The watermelon is ready to serve after 24 hours, but it is best if you wait 3-4 days before serving.

cherrypitting.jpg

Pickled Sour Cherries

  • 4 cups pitted sour cherries
  • ¾ cup white vinegar
  • ½ cup sugar
  • ¼ cup water
  • 1 Tablespoon kosher salt
  • 6-7 cardamom pods, lightly crushed

Place pitted cherries in clean jars.

Combine the vinegar, sugar, water, salt and cardamom in a small pot. Bring to a simmer and heat until the sugar is just fully dissolved. Pour the brine over the cherries. Allow the mixture to fully cool, then securely cover the jars and refrigerate.

They are ready to serve after 24 hours in the fridge, but they will develop deeper flavor the longer they sit.

threepicklesplated.png

Marinated Red Bell Peppers

  • 4 large red, yellow, or orange bell peppers
  • 1 clove of garlic, sliced thin (optional)
  • 1 teaspoon black peppercorns
  • 1½ teaspoons kosher salt
  • ½ teaspoon sugar or honey
  • ½ -¾ cup white vinegar (depending how much you need to cover the peppers)
  • ¼ cup water
  • 3 Tablespoons good extra virgin olive oil

Preheat the oven to 425°F.

Lay your peppers out on a lined sheet tray or baking dish. Place the peppers in the oven for 30-40 minutes, or until blackened, softened, and until the skin gets wrinkly and starts to peel off. It helps to flip the peppers over halfway through the cooking process. You can also do this directly over a gas flame or on a grill, turning the peppers until they are blackened and cooked on all sides.

Once cooked, transfer the peppers to a heatproof bowl and cover with plastic wrap. Allow the peppers to continue to steam and cool for 20-30 minutes.

At this point, the peppers should peel easily. Over a bowl, peel the peppers, and remove the stems and seeds. If any juice escapes while you are peeling the peppers, save the juice. It is gold.

Slice the peeled peppers into strips, about an inch thick, or however you prefer. Add the peppers to the bowl of their reserved juices. Add the sliced garlic if using, peppercorns, salt and sugar to the peppers. (If you do not like strong garlic flavor, omit the garlic entirely.) Mix everything together gently. Cover the peppers with white vinegar and water. Add the olive oil. Let the peppers marinate in the fridge overnight before serving. Peppers last in the fridge for about a week.

In Appetizer, Lunch, Dinner Tags Pickles, Zakuski, Pickled watermelon, Pickled fruit, Pickled sour cherries, marinated red peppers
Comment
mukmurachicken_mainphoto.jpg

Mukmura (or Mahmoora) Chicken

March 5, 2018

For the full article, head over to The Nosher ...

There are three distinctive Jewish Indian groups that happened to be largely isolated from each other: the Cochin Jews of Kerala in South India, the Bene Israel Jews of India’s West Coast and Mumbai, and the Jews of Kolkata in East India (formerly known as Calcutta). In The Book of Jewish Food, Claudia Roden recounts how Shalom Cohen from Aleppo was the first known Jew to settle in Kolkata in 1798. Soon after, Syrian and Iraqi Jews followed and developed a strong community there, where they worked as merchants and traders, and lived in harmony with their neighbors. Things changed in 1947 when India gained independence, and again in 1948 with the creation of the State of Israel; anti-Semitism grew as the Jews became associated with the colonial British power. During that time, most of the Jews from Kolkata immigrated to Israel, the US, England, and Australia. This once vibrant Jewish Indian community is now all but gone from Kolkata.

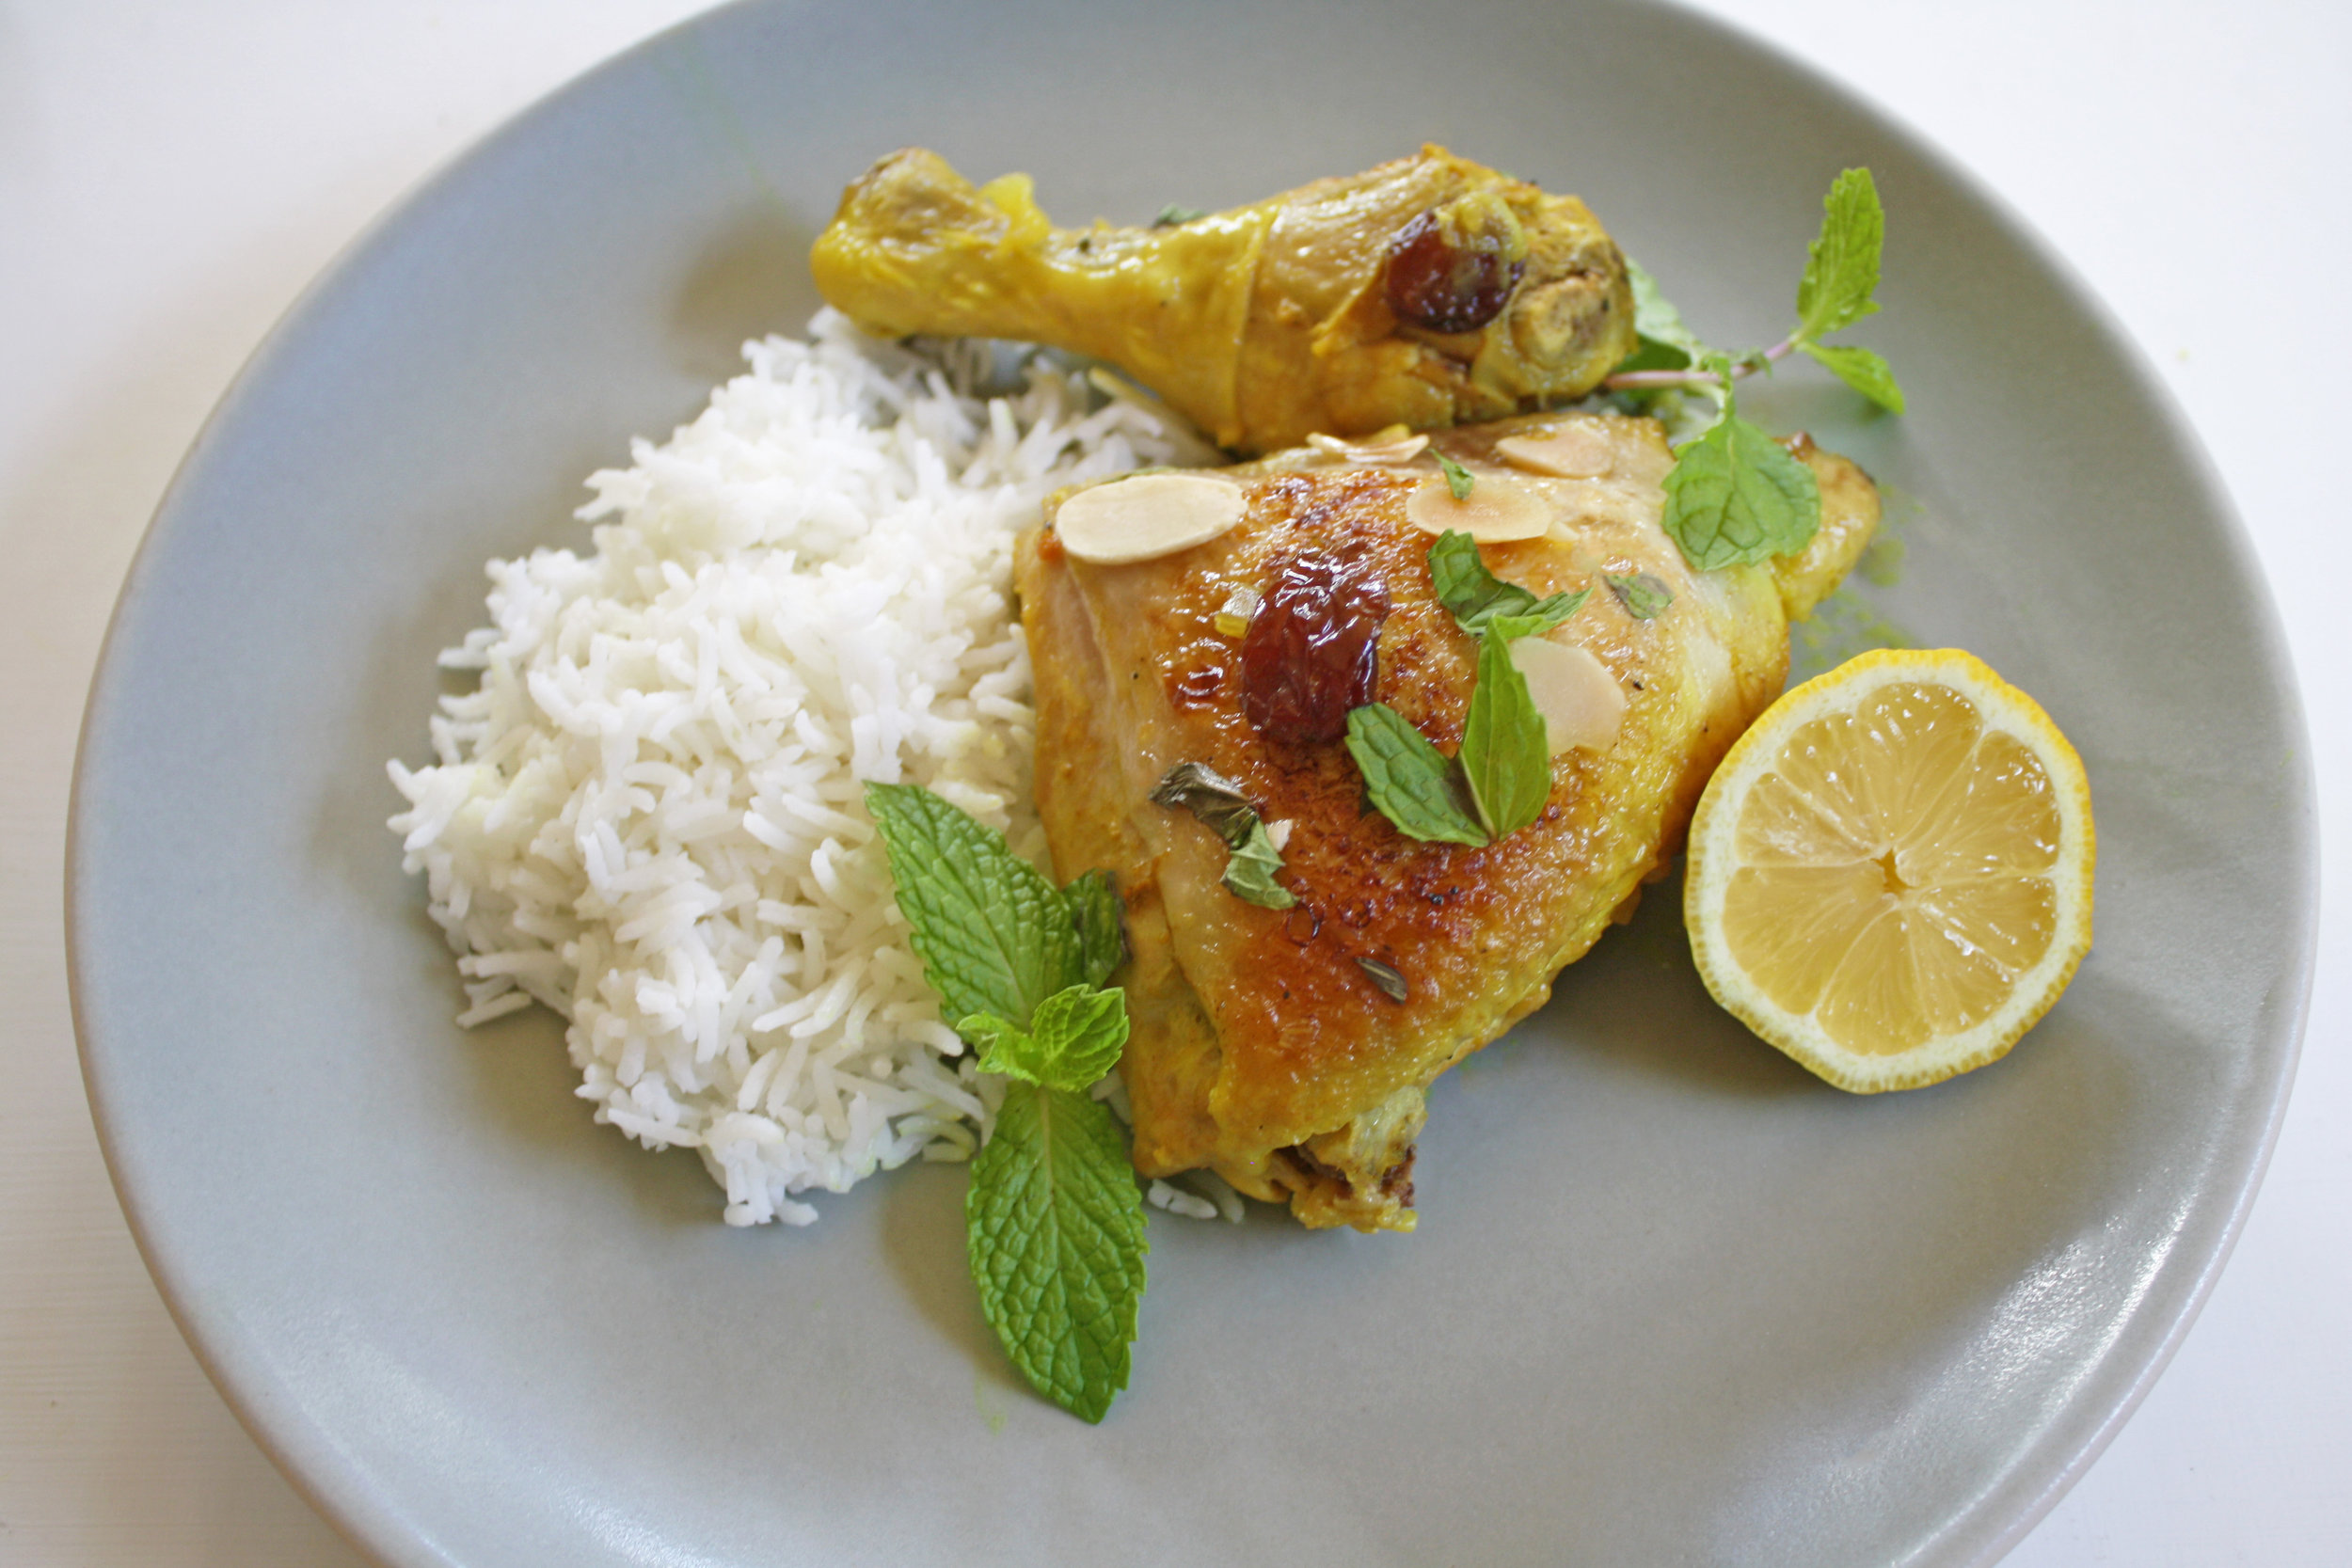
While only a handful of Jews still live in Kolkata, the food from this community has travelled with its people. Their style of cooking involves a combination of ingredients and preparations from the Middle East, with the spices and techniques of Indian cuisine. There are several cookbooks and articles devoted to Sephardic foods and Indian Jewish cookery that have documented some of the dishes of the Jews from Kolkata. I was first struck by a recipe I found in both Copeland Marks’ book, Sephardic Cooking, as well as in Indian Jewish Cooking, by Mavis Hyman. Mukmura (or Mahmoora) is a dish of chicken and almonds in a slightly sweetened tangy lemon sauce. I like any recipe that looks like it is simple to prepare but still offers big flavors, and this was clearly that. This chicken dish calls for easy to find bold ingredients like ginger, garlic, ground turmeric, lemon juice, and fresh mint. The chicken is braised, which means the meat won’t get dry, and it can easily be made in advance for entertaining, Shabbat, and holidays. By slowly simmering all of the ingredients together you develop a slightly sweet and sour sauce with all those warm spices and aromatics. After making the dish a few times, I experimented with some tweaks to the original method to boost the flavor even more, like browning the chicken before braising it, and being generous with the lemon juice and ginger. This dish is simultaneously comforting and exciting. It is the type of food that makes you feel like you’re eating something exotic and new, but with the benefit of having accomplished that from the comfort of your own home kitchen.

mukmuraingredients.jpg

Mukmura

Kolkata-Style Chicken and Almonds in a Lemon Sauce

Serves 4

Ingredients:

  • 1 4-5 lb. chicken, cut into 8-10 serving pieces
  • 1 teaspoon kosher salt, or to taste
  • 2-3 tablespoons oil
  • 1 medium white or yellow onion, chopped fine (about 1½ cups)
  • 2 large garlic cloves, minced fine
  • 1 Tablespoon freshly grated ginger
  • 1½ teaspoons ground turmeric
  • 1 cup water
  • ¼ cup raisins, rinsed
  • ¼ cup sliced or slivered unsalted almonds, without skin
  • ¼ cup fresh lemon juice, about 2 lemons
  • 1½ Tablespoons agave syrup or 2 teaspoons sugar
  • 2 Tablespoons chopped fresh mint, or to taste
  • lemon wedges, for garnish

Directions:

  1. Cut the chicken into 8-10 pieces; reserve the backbone for chicken broth if desired. You can also find a pre-cut whole chicken, or you can use 4-5 lbs. of your preferred bone-in skin-on chicken parts. Season the chicken pieces with a teaspoon of kosher salt.
  2. On medium high heat, heat a large Dutch oven or deep skillet with a lid. Add a drizzle of oil to the pot and then brown the chicken pieces on each side, about 2-3 minutes per side or until golden brown. Brown the chicken in batches if needed so as not to overcrowd the pot. Remove the browned chicken and reserve.
  3. Over medium heat, add the diced onions to the same pot so the browned bits that remain on the bottom can flavor the onion. Add an additional drizzle of oil if there is not enough remaining chicken drippings. Sauté the onion until softened and beginning to turn golden but not browned, about 5-6 minutes.
  4. Add the minced garlic, grated ginger, and turmeric to the onion mixture. Sauté for another 1-2 minutes, or until fragrant.
  5. Add the reserved browned chicken back to the pot in a single layer. Pour the water over the chicken.
  6. Bring the liquid up to a simmer and then lower the heat and cover the pot. Simmer for 20 minutes.
  7. Add the raisins, almonds, lemon juice, and agave syrup to the pot. If your water has significantly reduced, add a little more water so there’s liquid in the pot. Cover the lid again and simmer an additional 15-20 minutes, or until the chicken is cooked through with an internal temperature of at least 165°F. Taste and season with more salt if necessary.
  8. Transfer the chicken to a serving dish, pour the sauce over the chicken, and top everything with freshly chopped mint and a few lemon wedges. Serve with rice or your favorite side.
  9. Chicken can be made a day in advance and reheats well.
platedchickenwithrice_secondaryphoto.jpg
In Dinner, Lunch Tags Kosher food, Indian Jewish, Indian Jewish food, Indian Chicken, Chicken, Sweet and sour chicken, shabbat, holidays
Comment
saladolivieronsettable.jpg

Salad Olivier

December 31, 2017

Full article is available via The Nosher

...This salad was first prepared by Lucien Olivier in the 1860’s. Olivier was the French chef of a famous restaurant in Moscow called The Hermitage, hence the very French name for this now popular Russian salad. Also, Russians were obsessed with French culture at that time. Salad Olivier was an immediate hit, and it became the restaurant’s signature dish. Originally, it was made with crayfish, capers, and even grouse. After the revolution, simpler and easier to come by ingredients were more commonly adapted into the recipe. These ingredients are also all conveniently available in the dead of winter.

The popularity of the salad spread beyond Russia to Eastern Europe, the Balkans, and even to Iran and Pakistan. In fact, in our family we call this dish Salad de Boeuf (pronounced as “de beff”), which is what this salad is inexplicably called in Romania and Western Ukraine. Boeuf means “beef” in French, and this salad contains no beef at all. In each geographic locale, the salad might differ slightly. Sometimes the potatoes are mashed instead of cubed, or there’s shredded chicken instead of smoked meat, or sometimes there’s no meat at all, as was the custom in our family. What makes this type of potato salad uniquely a Salad Olivier is the presence of potatoes combined with carrots, peas, pickles, and hard boiled eggs. Everything should be chopped to roughly the same size. The appeal of something seemingly odd and vaguely average is ultimately mysterious, but the combination of hearty firm potatoes, sweet cooked carrots, crisp pickles, earthy peas, and silky eggs in a creamy tangy dressing just works. The ingredients meld all together, each losing its own particular edge to combine to make a complete range of salty, sweet, tangy, satisfying tastes in each bite. I think this salad’s enduring and far-reaching popularity proves that it’s eaten for more than tradition’s sake.

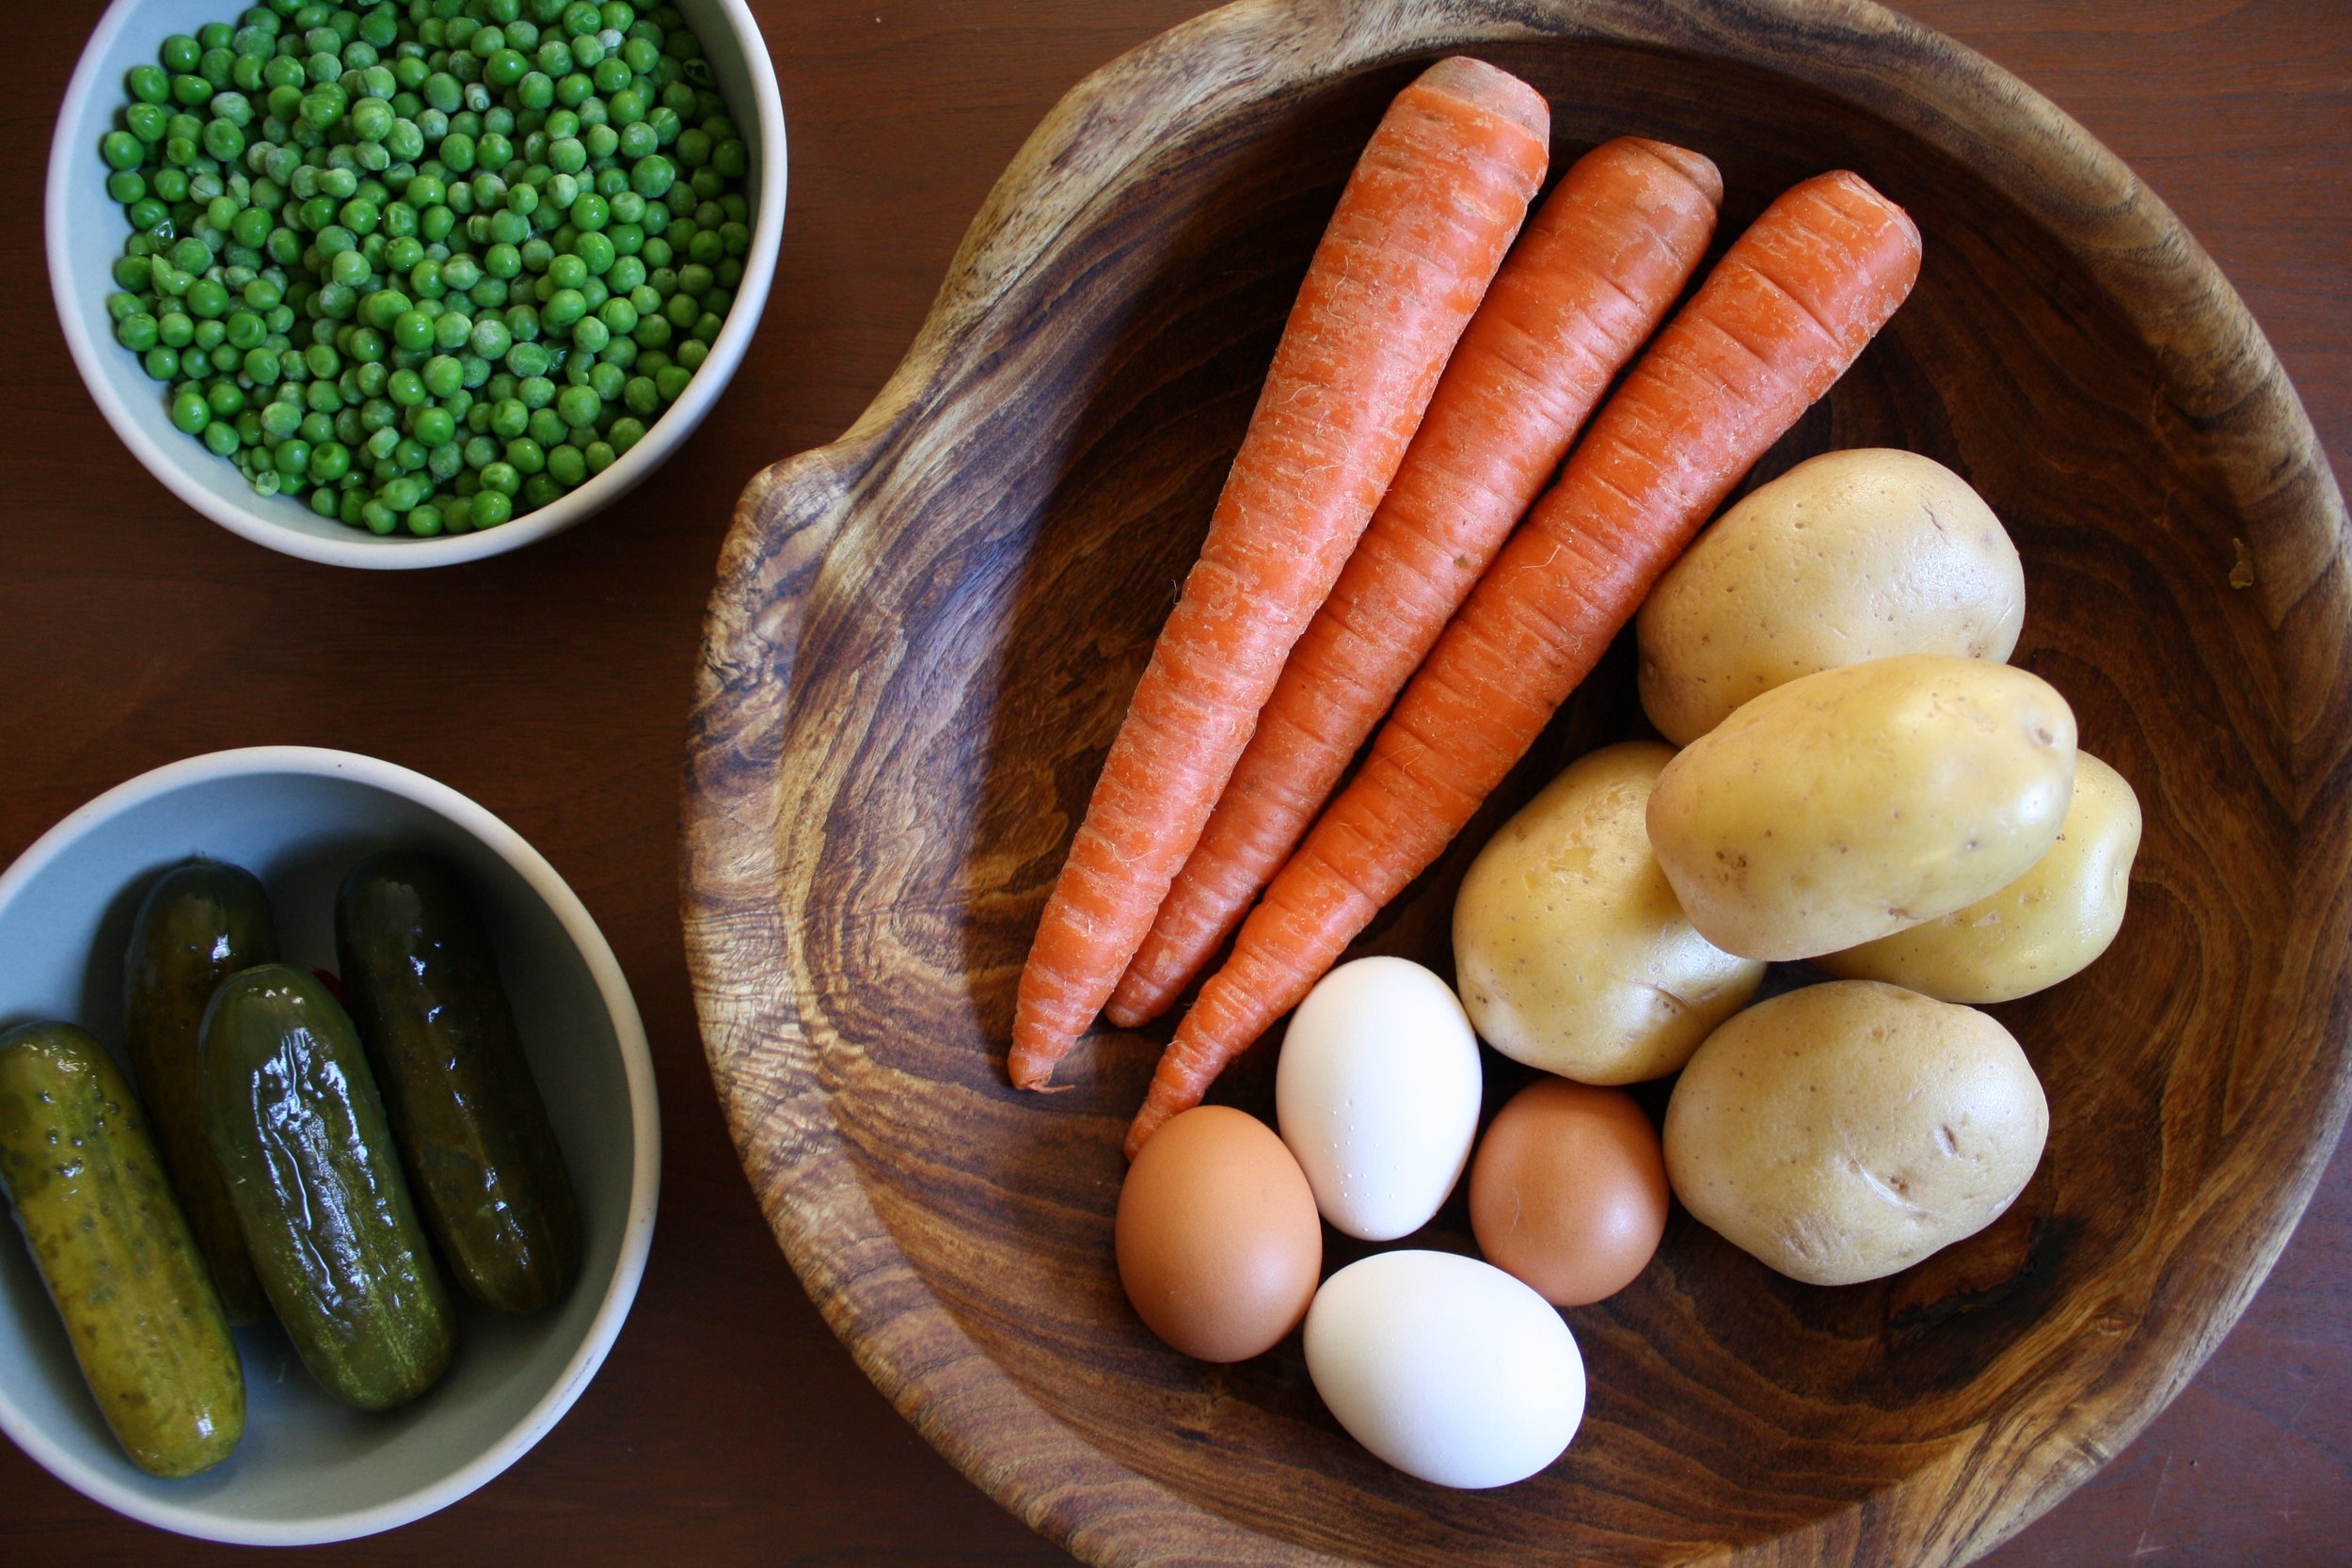
If you’re going to attempt to make this for the first time there are a few things to know. For one, this recipe reflects how my family likes this dish. If you’ve had this before it might be slightly different from what you’re used to. More importantly, the quality of each ingredient matters to the overall success of the dish. I like to use Yukon Gold potatoes because they hold up well and have a pleasant rich sweetness, but you can definitely try it with your favorite potato. Taste the carrots before you cook them; they should be sweet and flavorful, not the dull astringent variety you sometimes end up with. The best pickles for this dish are ones that come from the refrigerator section, that still have a crunch, and are brined in salt with zero vinegar added. They’re also known as “naturally fermented” pickles. The type of mayonnaise you use is also key, and I swear by Hellmann's/Best Foods brand mayo.

Salad Olivier

Serves 6-8

Ingredients:

  • 1.5 lbs Yukon Gold potatoes, about 4-5 medium
  • 3 large carrots
  • 4 large eggs
  • 3 large dill pickles, or to taste (use naturally fermented/brined pickles)
  • 1 cup frozen peas, thawed (you can substitute with fresh cooked peas or even canned)

For the dressing-

  • 1 cup good quality mayonnaise
  • 2 tablespoons olive oil
  • Juice of ½ a lemon, or to taste
  • 1 Tablespoon pickle liquid (optional)
  • ¾ Tablespoon kosher salt, or to taste
  • 2 Tablespoons chopped fresh dill (optional)
ingredietntspre-cooked.JPG

Directions:

 Wash the potatoes and carrots well. Add them to a pot, and fill with water. Bring the water to a boil, and boil the potatoes and carrots until easily pierced through with a knife. The carrots will cook faster, about 15-20 minutes. Once they’re tender remove them from the pot and allow the potatoes to finish cooking, about 15-20 minutes more, or 30-35 minutes in total. Be careful not to overcook your potatoes and carrots, you do not want them to end up as mush in the salad. Once cooked, set aside to cool or refrigerate. This step can be up to 2 days in advance.

While the potatoes and carrots are cooking, hard boil your eggs and allow them to cool.

Once cooled, carefully remove the peels from your potatoes. You can either remove or keep the peel on your carrots depending on your preference.

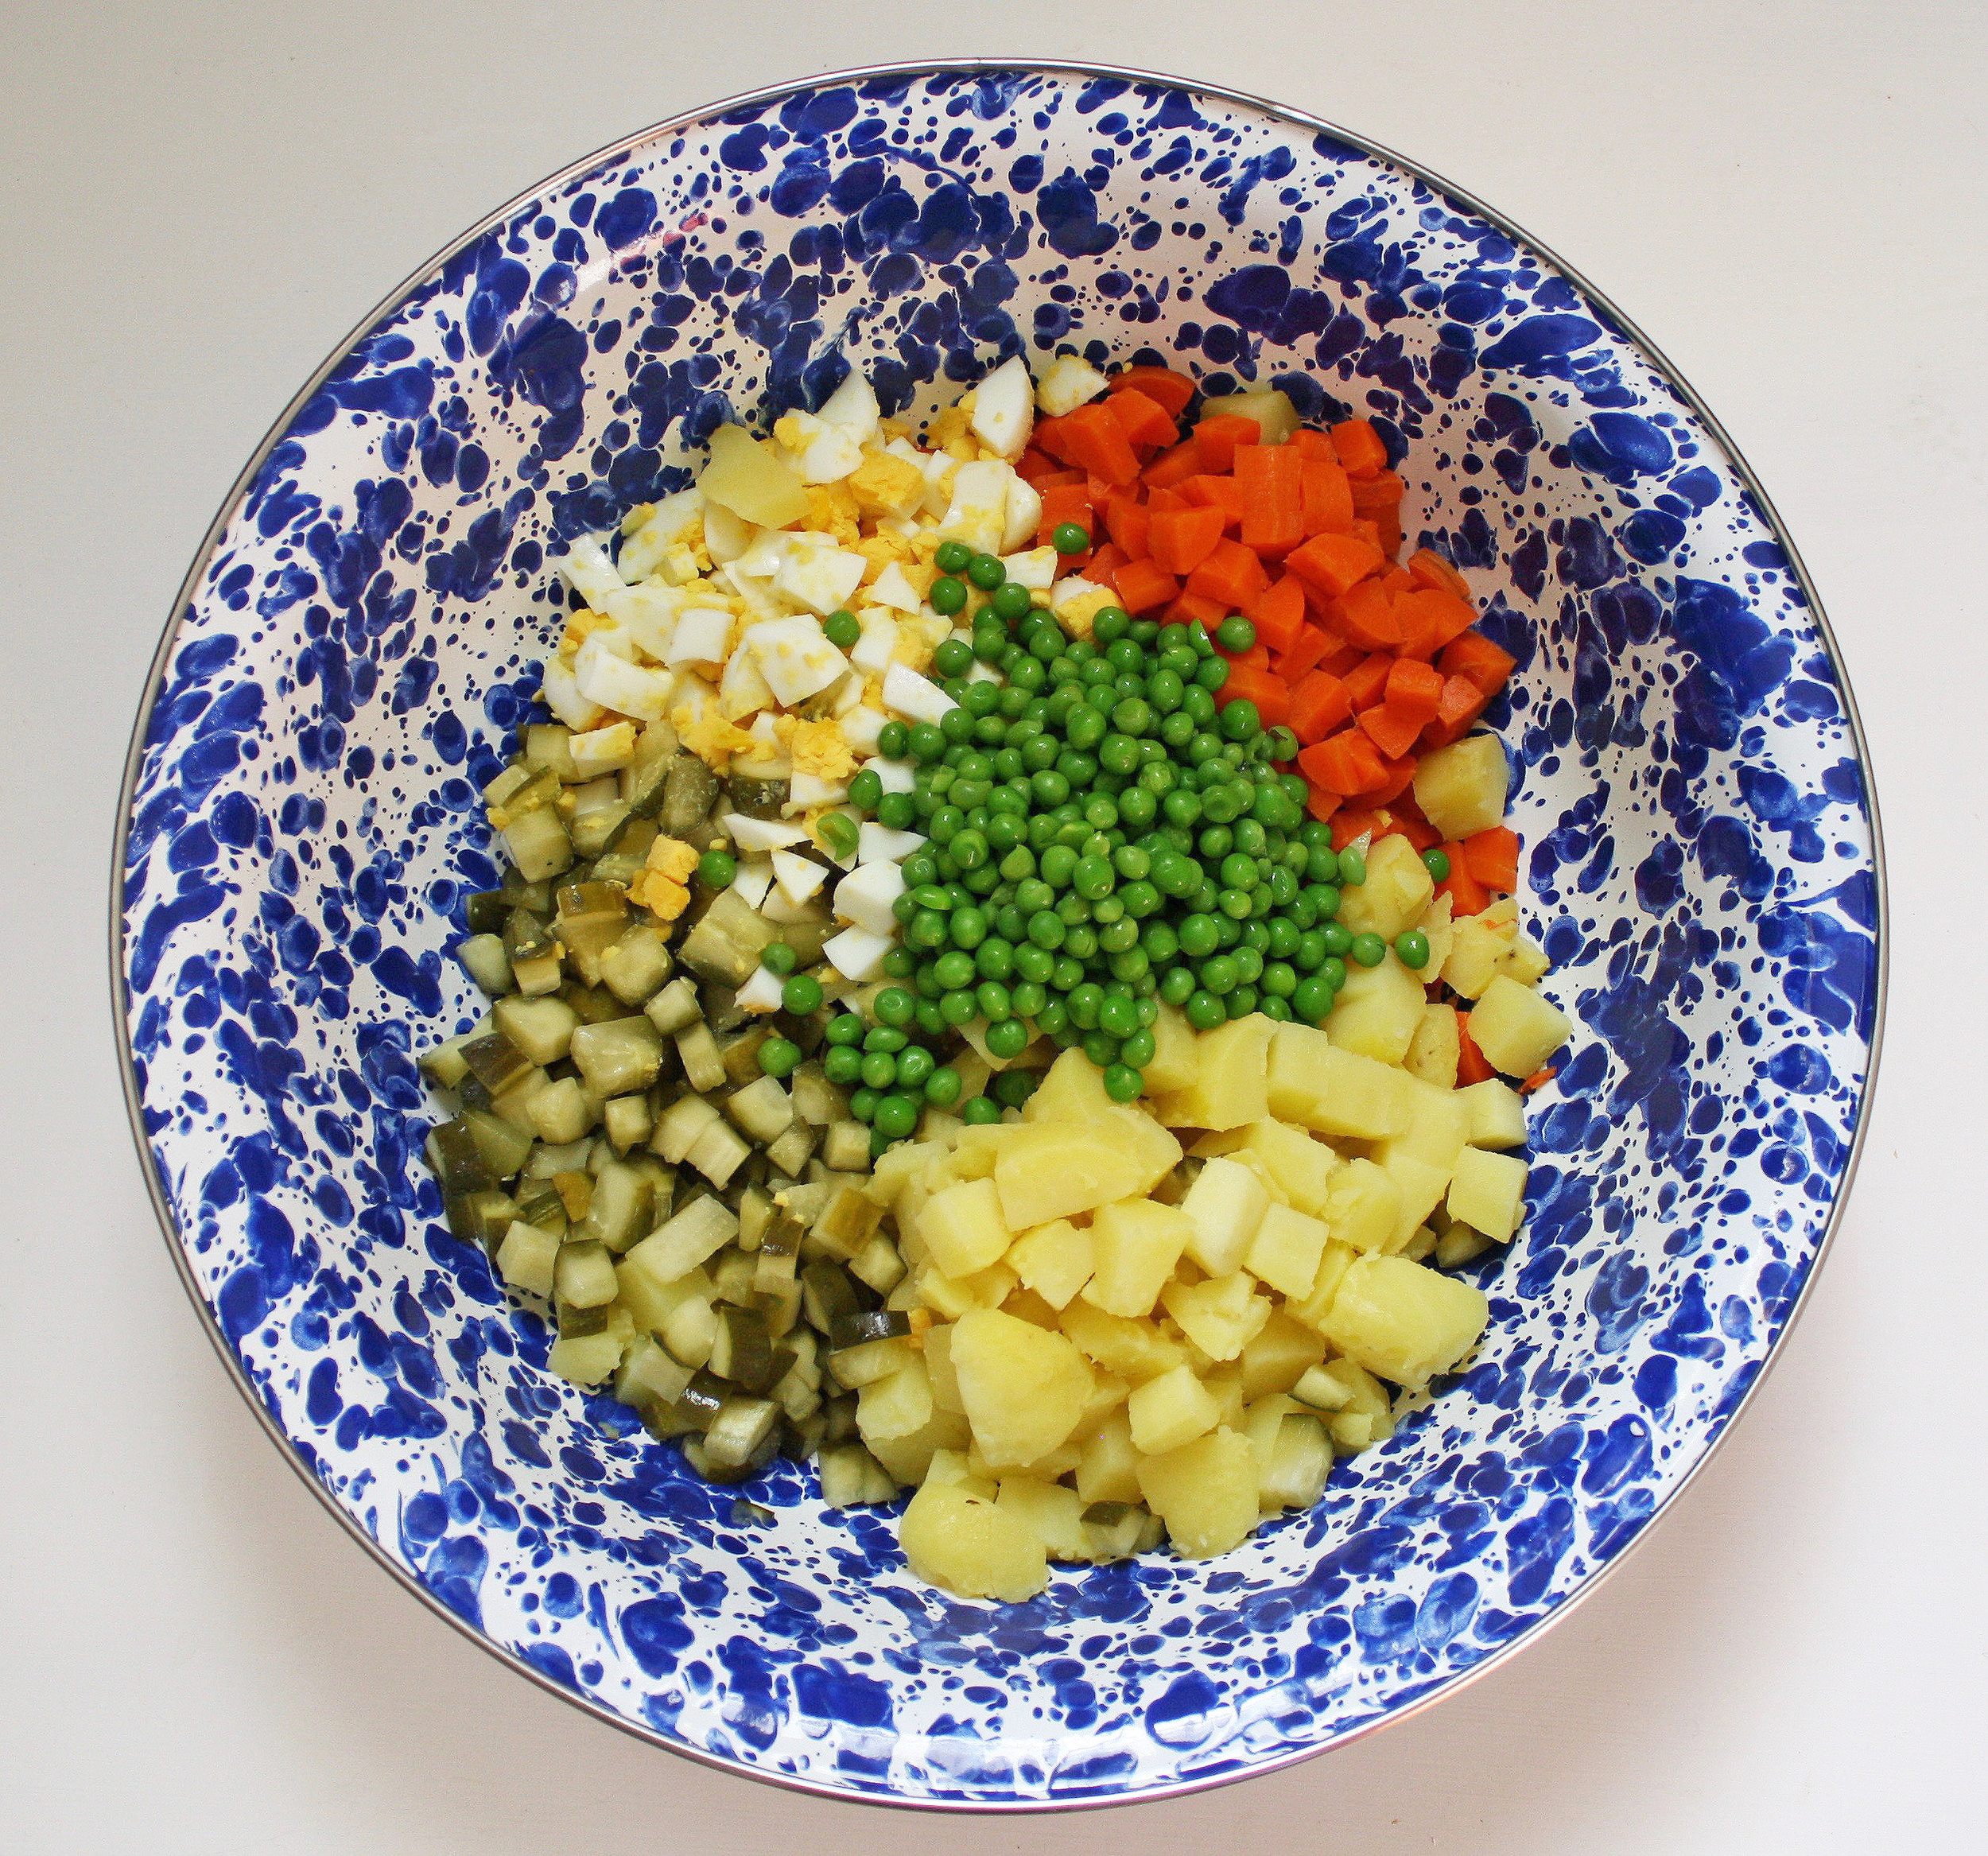
Cube all of the potatoes, carrots, and eggs to the same size. I like a medium-small dice.

Dice the pickles slightly smaller than the other ingredients as they have a stronger flavor.

Add the cubed potatoes, carrots and eggs to a large bowl. Add the pickles and thawed peas to the bowl.

In a separate small bowl, combine all of the ingredients for the dressing and whisk together. Taste and adjust accordingly.

allchoppedingredientsinabowl.jpg


Add the dressing to the potato mixture, and carefully stir until everything is fully coated in the dressing. Taste and add more salt if desired (every brand of kosher salt differs in salinity). If you want it creamier/tangier, add more mayonnaise or lemon juice. You can also use sour cream or yogurt if desired.

Allow the salad to chill for at least one hour before serving so that the flavors can all come together. This salad can be made up to a day in advance, and stores well for 2 days. You can also make this without the dressing up to 3 days in advance, then add the dressing before serving.

Before serving, transfer the salad to a serving bowl. This salad is known for being creatively decorated and festively garnished with fresh herbs, vegetable roses, etc. You can doll it up in any way you like.

saladolivier_justthesalad.jpg
In Holiday, Dinner, Appetizer, Lunch Tags Salad Olivier, Olivier, Russian cooking, Jewish cooking, salad, potato salad, potato
Comment

Okonomiyaki for Hanukkah

December 5, 2017

As written for THE NOSHER

The Japanese word Okonomiyaki is derived from two words: okonomi “how you like it” and yaki “grill.” Okonomiyaki is a customizable Japanese savory vegetable pancake. Like a latke, it gets cooked in oil in a fritter formation. Unlike a latke, it’s usually made into a large plate-sized pancake comprised mainly of cabbage. Food historians have linked the rise in popularity of okonomiyaki in Japan to World War II, when rice was more scarce and this recipe offered a filling meal or snack with a wheat-based starch. Throughout Japan there are regional differences and countless variations of okonomiyaki, but the most common form of the dish involves a batter made of flour, a variety of mountain yam, eggs, shredded cabbage, green onion, dashi, and often the addition of pork belly. It gets topped with its own tangy sweet sauce, Japanese mayonnaise, and bonito flakes (katsuobushi).

I first fell in love with okonomiyaki on a trip to Japan. You can find it there in restaurants that specialize in the dish, but it’s also something that is prepared in home kitchens. The cabbage gets slightly crisp, tender and sweet when seared in oil on a flattop or skillet, and then it gets generously slathered with an umami rich sauce, along with a welcome drizzle of creamy mayo. The richness, sweetness, and tanginess of these components all work perfectly together. A few months after I got back from Japan, I ended up eating at Brooklyn’s Japanese Jewish restaurant, Shalom Japan. I didn’t hesitate to order their Jewish-influenced spin on okonomiyaki. They’re known to top it with pastrami, or even corned lamb tongue and sauerkraut. It became clear there that okonomiyaki is a perfect fit on a Jewish table with its base of humble cabbage and onion. The fried pancake part of it all called out “Hanukkah.”

I am a fan of all pancakes and fritters, and I set out to modify the classic Japanese version for a recipe that didn’t require access to a specialty food store, and that could be made with kosher ingredients. Full disclosure: my version lacks authenticity. If you’re going for the real deal you’ll need a batter made with an okonomiyaki flour mix, or nagaimo yam; this special kind of yam is added in powdered form to the flour mix, or gets grated fresh into the batter. The toppings should include bonito flakes, and the batter should be made with dashi. These ingredients can be found at most Japanese markets. Instead of nagaimo yam, my version uses a batter of flour and potato starch, and instead of dashi I use water. I’ve also included a recipe for homemade traditional okonomiyaki sauce that can be made simply with easy to find ingredients, but you can also buy premade bottled sauce. You can make these pancakes large-sized and cut into wedges like the Japanese do, or slightly smaller à la a large latke. I wouldn’t go too small with this, as the vegetables tend to hold together better en masse. This recipe doesn’t need to be too exact and it works as a blank canvas for additional vegetables like kale, mushrooms, and/or daikon. In the spirit of Hanukkah, these okonomiyaki get cooked in oil, but they’re not heavily fried. The oil used to fry the Okonomiyaki gives a loving nod to the miracle of the oil glowing for eight days instead of one in the Temple, but the heap of vegetables and addictive sauce make this a nutritious and satisfying addition to any Hanukkah meal.

ingredientshotokonomiyaki.jpg

Okonomiyaki for Hanukkah

Serves 4

Ingredients:

For the pancakes-

  • ¾ cup all purpose flour or gluten free all purpose mix
  • ¼ cup potato starch or cornstarch
  • 1 teaspoon baking powder
  • 1 teaspoon kosher salt
  • 2 large eggs
  • ½-¾ cup water
  • ½ green cabbage, about 4½ packed cups
  • 3 green onions, sliced thin plus more for garnish if desired
  • 1 carrot, peeled and shredded
  • 4-5 inches daikon, peeled and shredded (optional)
  • Oil as needed (i.e. sunflower, canola, or peanut)
  • Sesame seeds, for topping (optional)
  • Mayonnaise, for topping (optional)

For the okonomiyaki sauce-

  • ½ cup ketchup
  • ¼ cup Worcestershire sauce
  • 2 Tablespoons soy sauce
  • 2 Tablespoons honey or agave syrup, or to taste
cutvegetables.jpg

Directions:

  1. Start by making the batter. Whisk together the flour, starch, baking powder and salt in a large bowl.
  2. In a separate bowl beat the eggs. Add the eggs and ½ a cup of water to the flour mixture. Whisk until smooth. You want a fairly thin, crepe batter-like consistency. If you find it too thick, add another ¼ cup of water. Try not to overmix, you do not want to overdevelop the gluten. Allow the batter to rest in the fridge for 30 minutes to an hour.
  3. While the batter is resting, prepare the vegetables. Take out the thick core from the cabbage half, then cut the halved cabbage in two. Thinly slice or shred the cabbage. Thinly slice the green onions. Grate the carrot and daikon if using.
  4. Make the okonomiyaki sauce: combine the ketchup, Worcestershire, soy sauce, and honey/agave in a bowl. Taste and adjust to your liking. The sauce should be tangy, savory, and a little sweet.
  5. Combine the batter with the vegetable mixture.
  6. Heat a cast iron skillet or a nonstick-skillet with about 3 tablespoons of oil over high heat. Once the oil is glistening and hot lower the heat to medium low, and, add some of the cabbage mixture to the pan, gently nudge it into a circle shape. I like to make each pancake with about 2 cups of the mixture. For me, that makes an ideal sized pancake that isn’t too hard to flip, and one that will hold together. Cover the skillet with a lid for 3-4 minutes. Carefully flip over the pancake, and cover it with a lid for an additional 3-4 minutes, or until browned on both sides and cooked through. Make sure not to cook on too high of a heat or the pancake might burn while remaining raw in the center.
  7. Serve hot topped with a generous spread of the okonomiyaki sauce, mayo if desired, sliced green onions and sesame seeds.
  8. Slice and serve!
2closeupokonomiyaki_secondaryphoto.jpg
In Dinner, Lunch, Vegetarian Tags Hanukkah, Okonomiyaki, Kosher food, kosher, jewish food, japanese food
Comment
SquashOnionBurekas_favorite.jpg

Butternut Squash and Caramelized Onion Burekas

November 20, 2017

This is a seasonal twist on classic burekas that I wrote up for alma. (check out their site for the full article). The caramelized onions are the key ingredient in this dish; they always take longer than you think to caramelize, but the resulting flavor is worth the work. This makes a great side, appetizer, or snack during the holidays. 

Butternut Squash and Caramelized Onion Burekas

Makes 24 burekas

INGREDIENTS

  • 2 sheets puff pastry (10” x 15”), defrosted in the refrigerator overnight
  • 1½ lbs. butternut squash (1 large squash), halved lengthwise and seeds removed
  • 1 large yellow onion, medium diced
  • 2 tablespoons olive oil or butter
  • 1 big fat clove of garlic or 2 medium-sized, minced fine
  • 1 teaspoon ground coriander
  • 2-3 sprigs thyme, leaves removed from stems
  • Pinch of cayenne pepper
  • Salt and pepper, to taste
  • 1 large egg yolk
  • Black and/or white sesame seeds, to garnish

DIRECTIONS

Preheat the oven to 375°F.

Drizzle the halved butternut squash with oil, then place it cut-side down on a sheet pan. You don’t need to peel the squash. Roast until the squash is fully cooked and tender, about 35-45 minutes.

roastedsquash.jpg

While the squash is baking, caramelize your onion by putting a few tablespoons of butter with a drizzle of olive oil in a sauté pan over medium low heat. If keeping the dish non-dairy, use just olive oil. Add the diced onion to the pan, and sauté over low or medium low heat until starting to soften, about 5 minutes. Season with a generous pinch of salt and then continue to let the onion cook and caramelize, stirring occasionally so the onion doesn’t burn; make sure to keep the heat fairly low. This is where patience comes in, beautiful caramelized onions can take 30-45 minutes to make. You want your onions golden and sweet, you don’t need to caramelize them until they’re a deep brown. This is a good tutorial if you need it.

Add the minced garlic to the caramelized onions, and sauté for another 2-3 minutes or until the garlic is fragrant but not at all browned. Turn off the heat.

caramelizedonions.jpg

Once the squash is cooked and slightly cooled, scoop the inside of the squash into a bowl and discard the peel. Add the caramelized onion to the squash. Mix together. The mixture should be soft and not too lumpy.

Mix in the ground coriander, thyme, and cayenne. Taste, and then season with salt and pepper as desired. Allow the squash mixture to cool before assembling the burekas. You can make this filling up to two days in advance and store in the fridge.

To assemble the burekas: roll out a sheet of puff pastry until rectangular and just slightly thinner than when it comes out of the package. Divide the dough into 12 squares: cut the dough in half widthwise, and then cut each half into half again. Next, cut the dough into thirds lengthwise. Put a spoonful of the filling into each square. Fold over the dough to form a triangle shape, and press the edges together. There’s no need to crimp or press too hard, the filling will stay put, and you want to ensure there are layers of flaky pastry.

processshotofburekas.jpg

Transfer the formed triangular burekas onto a baking sheet, place each bureka about an inch apart, 12 will fit on each baking sheet. At this point, you can freeze the burekas and reserve them for when you’re ready to bake.

Before baking, combine the large egg yolk with a small splash of water. Beat well. Brush the tops of the burekas with the egg wash. Sprinkle with sesame seeds.

formedburekasprebaking.jpg

Bake for 20-25 minutes, or until golden brown and flaky. Transfer to a wire baking rack, and allow to cool for at least 10 minutes before serving. Burekas are best served warm or at room temperature.

squashburekassecondaryphoto.jpg
In Holiday, Dinner, Lunch, Appetizer Tags jewish food, kosher, burekas, squash burekas, caramelized onion, appetizer, holiday food, thanksgiving, thanksgiving food, jewish thanksgiving, pastry, homemade, baked goods
Comment
mbphotopdown.JPG

Matzah Ball Pho

October 23, 2017

I wrote up my matzah ball pho recipe for The Nosher. Head over there to read the full article, and check out other great recipes :)

MATZAH BALL PHO

Ingredients

For the broth:

  • 2 medium unpeeled yellow onions, halved
  • 1 large 4”-5” piece of ginger, cut in half lengthwise
  • 5 quarts cold water
  • 1 4-5 lb. chicken, cut into parts
  • ½ lb. chicken wings
  • 2 tsp kosher salt, or to taste
  • 1 Tbsp rock sugar or Turbinado (raw) sugar
  • 1 cinnamon stick
  • 2 star anise
  • 1 tsp whole coriander seeds
  • 2 Tbsp fish sauce or tamari
  • 1 small white onion, thinly sliced
  • 4 scallions, thinly sliced

For the matzah balls:

  • 1 cup matzah meal
  • 1 teaspoon kosher salt
  • 1 teaspoon baking powder
  • ½ teaspoon baking soda
  • 4 large eggs, beaten
  • ¼ cup schmaltz or oil (vegetable or safflower)
  • ¼ cup minced scallion
toppings.JPG

For the toppings:

  • 1 large bunch of fresh Thai basil
  • 2-3 limes cut into wedges
  • 3 cups mung bean sprouts
  • 2 Fresno chilies or jalapenos, sliced thin
  • Hoisin sauce, to taste
  • Sambal oelek (garlic chili sauce), to taste
  • Sriracha, to taste

Directions

To make the broth:

  1. Char your onions and ginger by either placing them on a baking sheet under a broiler for 8-10 minutes or by charring them over a gas flame on your stovetop for a few minutes on each side. The onions and ginger should be nicely charred but still firm — this essential step will deepen the broth’s flavor. Once the onions and ginger are charred, remove the skin from the onion. Rinse the onion and ginger, and use a small knife to scrape off excess charred bits to prevent your broth from getting murky.
  2. Cut your chicken into parts, separating the breasts, legs, wings and backbone. This will ensure that your chicken cooks evenly and that the breasts will not become dry or tough when simmered.
  3. In a small skillet over medium heat, toast the cinnamon, anise and coriander until lightly browned and fragrant, about 2-3 minutes. Be careful not to burn the spices. Add the onion, ginger and chicken to a large pot. Fill the pot with 5 quarts of water. Bring the water to a simmer; skim the impurities as they rise to the top.
  4. After 20 minutes of simmering, or once they’re cooked through, remove the chicken breasts and allow them to cool. Add the toasted spices, salt and sugar to the pot. Continue to gently simmer the mixture for 1 hour.
  5. Remove the remaining chicken parts and strain the liquid through a fine meshed sieve. Bring the liquid back to a simmer for another 20-30 minutes, or until the liquid has reduced by about a quarter. This step will further deepen the broth’s flavor.
  6. While the broth is simmering, shred the chicken meat and reserve for serving. Once reduced, turn off the heat and add the fish sauce or tamari to the broth. Taste, and add additional seasoning if desired.
formedballs.JPG

To make the matzah balls: 

  1. While the soup is simmering, in a large bowl whisk together the matzah meal, salt, baking powder and baking soda. Add the beaten egg and schmaltz/oil. Add the scallions. Mix everything together until just combined. Do not over-mix.
  2. Refrigerate the mixture for at least 30 minutes, and up to a day.
  3. Form the matzah ball mixture into even-sized balls. You can determine the size based on your preference, but know that they will double when cooked. It makes it easier to form the matzah balls if you rub a little oil on your hands beforehand.
  4. Bring a large pot of water to a boil. Lower to a simmer and gently drop the matzah balls into simmering water. Place the lid on the pot and continue to simmer for 30 minutes. Once cooked, matzah balls are best stored in their cooking liquid.

To serve the matzah ball pho:

  1. Add the shredded chicken, raw sliced onion and scallions to a bowl. Ladle hot broth into the bowl. Add the matzah balls to the soup.
  2. Serve along with basil, bean sprouts, lime wedges, hoisin and hot sauces. Allow people to garnish and customize their pho to their liking.

Note about the recipe: Traditional Pho Ga calls for fish sauce in its broth. Fish sauce is made of fermented anchovies. Red Boat makes one that is certified kosher, but many who keep strictly kosher will not combine fish and meat in the same dish. To make this kosher, you can use tamari in lieu of fish sauce for extra umami flavor in the broth.

mbphosideview.jpg
In Dinner, Lunch, Holiday Tags pho, matzo ball, matzah ball, matzah ball pho, soup, jewish food, kosher food, dinner
Comment

Preserved Lemons

April 27, 2017

Citrus season in California always seems never ending to me. In a good way. But there is a season, and that season peaks in winter, and spills into spring. The Meyer lemons are still around, but they're definitely on their way out. Before they go, I like to preserve a few jars.

Preserved lemons are some of the easiest of preserved foods to make. They involve little other than lemons, salt, and sanitized mason jars (just boil the jars totally submerged in water, lids off, for 10-12 minutes). You can flavor them with whatever spices you like - although I'm partial to the combination of black pepper, bay, and cinnamon. A friend gifted me a jar of lemons she preserved with fennel seed and pink pepper corn, which was lovely.

And then what do you do with them?

They're pungent, and borderline astringent. They're salty, acidic, and flavor-packed. A little goes a long way. But that little bitt adds notes of complexity. It makes you go: "what's in this?" It both highlights the essence of a lemon, and takes lemons to another otherworldly flavor.

I like to use them in homemade hummus (a la Joan Nathan's recipe in her new cookbook). They're beautiful in chicken dishes, and in tagine (they are a common North African ingredient). I also like to make a simple dip with thick plain yogurt, chopped fresh mint, and super finely chopped preserved lemon. 

This recipe works for any lemon, but lemons that are thin-skinned, like Meyer's, seem to work best. 

Preserved Lemons

Makes 1 pint jar

  • 5-6 lemons, depending on their size
  • Kosher salt, as needed
  • 3-4 fresh bay leaves
  • 1 cinnamon stick
  • 1 tablespoon black or pink peppercorns
  • Lemon juice, as needed
  • 1 pint mason jar, sterilized

Quarter each lemon by slicing the top down within half an inch of the bottom, leaving them connected. Pack salt into the lemon then press it back into its original shape.

Fill the bottom of the mason jar with a layer of salt. Layer the salted lemons into the bottom of the jar. Top each layer with more salt, and squeeze lemon juice over each layer as well. Top each layer with bay leaf and peppercorn, and stick the cinnamon stick into the jar as you layer. Pack all of the lemons in tight and make sure everything is covered with a layer of salt and lemon juice.

Place the jar on your kitchen counter or in a pantry and shake the jar once a day for 30 days. After 30 days, the lemons are ready for use. Once opened, I prefer to keep my lemons in the fridge. They’ll keep for up to 1 year.

Before using the lemons, rinse each piece as needed to remove the excess salt.


In Lunch, Dinner, Appetizer, Vegan, Vegetarian Tags preserved lemons, lemons, meyer lemons, preservation, snack, dinner, lunch, citrus, california
Comment

Beet Cured Gravlax

February 13, 2017

Making homemade gravlax is easy. It's one of those great recipes that impresses guests, looks beautiful, requires zero cooking, and takes minutes to make. Heads up: while this recipe is easy, you need to prepare it 3 days in advance.

The beets create a lovely deep scarlet color on the top layer of the fish, and they add a very subtle sweet, earthy, flavor. 

I love to serve this thinly sliced on a platter with fresh veggies. Bagels and cream cheese are always welcome accompaniments for cured fish. Enjoy!

Beet Cured Gravlax

  • 3 lb center-cut salmon filet, as thick as possible 

  • 2 medium red beets (about 1 pound), peeled and finely grated

  • 1 large bunch fresh dill, roughly chopped

  • Zest of 1 large orange

  • Zest of 2 lemons

  • 1 cup plus 2 Tablespoons kosher salt 

  • ½ cup granulated sugar

  • ¼ cup freshly cracked pepper

Note: Ideally, your filet is at least 1½-2” thick, and evenly thick across the fish. If you have thinner parts of a large filet, they may be too salty once cured, and you can discard those ends. Make sure all of the bones are removed from the salmon. 

Directions:
In a bowl, combine the grated beets with chopped dill, orange zest, lemon zest, salt, sugar, and pepper. 

Place a large piece of plastic wrap big enough to cover the fish on the bottom of a non-metal dish (pyrex or ceramic). Place half of the beet mixture on the bottom. Place the salmon skin-side down, and then rub the rest of the beet mixture on top. Tightly wrap the salmon in the plastic wrap. Place another pan/dish on top of the salmon and weigh it down (something like canned goods or small weights works well).

Cure for 3-4 days, or until the salmon is significantly firmer to the touch. Each day, flip the salmon over and drain any excess liquid. Once fully cured, scrape off the beet mixture and discard. 

Serve thinly sliced with the accompaniments of your choice. Cured salmon will keep wrapped tightly in the fridge for up to one week. 

In Dinner, Holiday, Lunch, Appetizer Tags salmon, lox, gravlax, bagels, kosher
Comment

Perfect Salmon with Rosemary and Lemon

October 26, 2016

Whenever I make salmon for a client, I always get asked: "How did you make this?" When I tell them, they are then always surprised by how easy it is.

The most important factor for me is that the salmon has to be high quality - e.g. wild and fresh. Previously frozen and defrosted salmon will not have the same texture as fresh salmon. It will likely turn out dryer. It's hard to make frozen salmon as awesome as fresh salmon. For me, making fish is a treat. Wild fresh fish is more expensive than previously frozen fish, but I treat it as a seasonal special occasion treat.

The second most important factor when cooking salmon is to not assume that one cooking time is going to work each time you make the dish. It may sound annoying, but it really is done when it's done.  Each salmon fillet is of varying thickness and density, and therefor will cook at differing rates. Over time, it gets easier and easier to tell when the fish is done just by looking at it and smelling it... but here's the trick for checking doneness: stick the tip of a knife blade into the thickest part of the fish. Put the blade against your lips, if it's hot/warm, it's cooked through. If the blade is cold it needs more time. This allows you to pierce the fish with minimal destruction, no need to slice it in half and ruin the fillet.

Everything else is incredibly simple. You can add whatever favorite herbs or sauces you like to your salmon using this method.

Roast Salmon with Rosemary and Lemon

  • Salmon fillet, either whole or cut into individual fillets (I like one's that are 6-8 oz per person)
  • Lemon, thinly sliced
  • Sprigs of fresh rosemary
  • Salt and pepper, to taste
  • Olive oil, to drizzle

Preheat the oven to 425°F.

On a parchment or foil-lined baking sheet, place the salmon skin side down. 

Salt and pepper the fish. Top each fish with thin slices of lemon and sprigs of fresh rosemary (either left whole or chopped fine). Drizzle the top of the fish with olive oil.

Bake for 7 minutes, then turn the pan around (or rotate pans if making salmon on two sheet pans). Depending on the thickness of the salmon, check on its doneness after another 5-6 minutes. Most salmon cooks in about 14-15 minutes. Serve immediately with your favorite sides. Leftover salmon keeps for 2 days in the fridge. 

In Lunch, Dinner Tags Salmon, Fish, Pescatarian, Cooking, Recipe
Comment

Spring Chicken

April 28, 2016

Like so many good things, this dish was discovered as a result of throwing together whatever I had in the fridge into one pot and putting it into the oven. Since then, I've been cooking it on repeat.

It was a Sunday, I had two large leeks leftover from another meal sitting hopefully in the fridge. I had a pile of good sweet potatoes (yams) sitting in a bowl on my counter. I had a whole chicken waiting to be roasted. When everything came together and ended up on the table, we ate the first few perfect bites in total happy silence.

I can and have cooked chicken dozens of ways, but among my favorite preparations is putting the entire bird into a Dutch oven. You can make this recipe in a deep casserole dish or even in a roasting pan, but I can't guarantee the same success. There's just something that ceramic cast iron does to the bird: the meat stays tender, the skin gets perfectly browned, the flavors are somehow more pronounced. Yes, these pots are generally expensive. I have been lucky enough to have been gifted a few that I otherwise would not have been able to afford, but I also have a pot that I got years ago for $50 dollars at World Market and it's the one that I made this chicken in, and I continue to use this cheaper less sexy Dutch oven for countless other dishes. The point is, any cast iron pot will do. Even a plain lodge cast iron pot would be great. If you don't have one, this one time investment will last forever and will be a welcome addition to your kitchen.

This recipe can be modified endlessly. I like to use Japanese sweet potato alongside the beautiful orange variety. I like to throw in a shallot or two for a contrasting onion note. I would happily swap out sweet potatoes for carrots and parsnips, or plain good quality potatoes if I didn't have yams on hand. I sometimes use fresh rosemary, and sometimes I use fresh thyme. Sometimes I use both. I could get away with neither. You get the picture...

But in its best form, this dish is about leeks and sweet potatoes, leeks and sweet potatoes, and leeks and sweet potatoes. Cooked down with the chicken, the aromatic sweetness of the leeks marries with the floral sweetness of the potatoes in rich chicken drippings. The vegetables get very soft, the leeks become unrecognizable, and it all goes so well with perfectly cooked, deeply savory, crisped roast chicken.

All this glory comes together quickly and easily. Everything is thrown into one pot, everything is cooked at the same time, no extra sides are necessary (unless desired). This is a very happy Sunday night meal.

One Pot Roast Chicken with Leek and Sweet Potato

Serves 4-5

  • 1 whole 5 lb. chicken, or you can use the same weight of just white or dark meat pieces (but you will want skin on bone in pieces)
  • 3-4 medium sweet potatoes (1 lb./450g) (any variety or mix of varieties)
  • 2 large whole weeks (1 lb./ 450g)
  • 1 large shallot (3-4 oz / 90g)
  • 4-5  large cloves of garlic, smashed and peeled
  • 3-4 sprigs fresh rosemary
  • kosher salt, to taste
  • freshly ground pepper, to taste
  • Hungarian parika, to taste (optional)
  • Olive oil, to drizzle
  • juice of 1/2 a lemon
  • 1/2 cup water (or white wine or chicken stock if you have it)

Preheat oven to 375°F.

Cut the sweet potatoes into chunks that are no more than 1" in thickness. If the chunks are too thick they might not cook through. Trim the green tops off of of the leek. Use the white/light green part of the leeks by cutting them in half lengthwise, and then washing them well to remove all of the grit. Roughly chop or slice the leeks into half moons, their thickness is totally up to you. Halve the shallot lengthwise and cut it into half moons.

To a pot add the chopped sweet potato, leeks, shallot, smashed garlic, and whole springs of fresh Rosemary (the leaves will come off the stems as everything cooks. Season lightly with salt and pepper.

Generously season the whole chicken with salt and pepper, inside and out. Top with paprika if using Drizzle the chicken generously with olive oil, and rub the oil all over the outside of the chicken.

Place the seasoned chicken into the pot on top of the sweet potato mixture.

Squeeze the juice of half a lemon over the chicken. Add 1/2 a cup of liquid to the pot, drizzled all over the veg. The liquid will help cook the vegetables and keep everything from getting too dry.

Put the lid on the pot (if using a deep casserole dish or roasting pan, cover the dish/pan tightly with foil). Cook with the lid on for 45 minutes. Cook with the lid off for the rest of the cooking time, about 30 minutes - depending on the size of your chicken. You know the chicken is done when it is golden brown, the juices run clear when pierced, or when the internal temperature reaches at least 165°F when tested with a meat thermometer.

Once the chicken is cooked, let it rest for at least 10 minutes before serving. Carve, and serve the chicken with the cooked sweet potatoes and leeks.

In Dinner, Lunch Tags chicken, roast chicken, one pot meal, one pot chicken, sweet potatoes, leeks, sweet potato and leeks, roasted vegetables, dinner, sunday night, lunch
Comment

Citrus, Pomegranate and Mint Salad

January 21, 2016

Tu B’Shevat Citrus, Pomegranate, and Mint Salad

Serves 4-6 (recipe can be doubled or tripled as needed)

for the salad-

  • 1 small head of lettuce, your favorite variety (Speckled, Romaine,Little Gem)
  • 2 small Cara Cara oranges (or any available orange)
  • 1 small blood orange (or any available orange)
  • 2 tangerines
  • ½ cup feta cheese, cubed small or crumbled
  • ⅓ cup pomegranate seeds
  • ¼ cup fresh mint leaves, chopped

for the dressing-

  • 1 tablespoon pomegranate molasses
  • 1 tablespoon fresh lemon juice
  • 1 teaspoon honey, or to taste
  • ½ teaspoon salt
  • ⅓ cup extra virgin olive oil

Start by removing the peel and outer membrane from all of the citrus. Slice off the very top and bottom of the fruit. Next, cut the peel and outer membrane away from the flesh by standing the fruit on its bottom and carefully run the knife alongside the fruit, cutting away the peel one section at a time. Once you have cut away the peel, slice the citrus into half inch rounds. Alternatively, you can also fully supreme the fruit.

Lay the lettuce leaves down into your serving platter or bowl. If using large leaves of lettuce, slice the lettuce into smaller pieces. Lay the fruit on top of the lettuce. Sprinkle with pomegranate seeds and fresh mint. Season with a pinch of salt.

In a small bowl, whisk together the pomegranate molasses, lemon juice, honey and salt. Slowly whisk in the olive oil. Taste and adjust according to your liking. Drizzle the dressing over the salad and serve.

In Lunch, Dinner, Vegetarian, Vegan Tags Salad, Tu B'Shevat, Citrus, Blood Orange, Cara Cara Orange, Feta, Mint, Holiday, Vegetarian
Comment

Daikon and Potato Latke with Ponzu Dipping Sauce

December 8, 2015

My love of Japanese food led me to reconsider the traditional Hanukkah potato latke served with applesauce and sour cream. Don’t get me wrong, classic latkes are delicious, but sometimes I love a little variety on my holiday table. Traditional Japanese tempura is often served with citrusy Ponzu sauce and finely grated Daikon radish. The salty tangy Ponzu, accompanied with the fresh cool Daikon are as welcome to latkes as they are to lightly fried vegetables and fish. Adding Daikon to the batter as well makes these latkes a touch sweeter and lighter than their all-potato counterparts. Flavorful sharp scallion garnish the latkes and bring a touch of brightness to the final dish. 

The recipe can be halved, but you may want to even double it. These latkes will go fast!

Daikon and Potato Latkes with Ponzu Dipping Sauce

Makes 24-27 Latkes, Serves 8-10 (recipe can be easily halved or doubled)

for the latkes-

  • 1½ lbs. (680 grams)  Russet potatoes, about 3-4 medium sized
  • 1½  lbs. Daikon radish (680 grams)
  • 1 large yellow or white onion
  • 3 medium scallions, sliced fine
  • 2 large eggs, beaten
  • ¼ cup all purpose flour (can be substituted with all purpose gluten free flour)
  • 1½ teaspoons kosher salt
  • peanut or vegetable oil, as needed

for the Ponzu sauce-

  • ½ cup light soy sauce
  • juice of 1 large orange, about ½ a cup
  • juice of 1 lemon, about ¼ cup
  • 3 tablespoons mirin
  • ¼ teaspoon red pepper flake, or to taste

for garnish-

  • ½ lb. (230 grams) Daikon radish, peeled and finely grated
  • sliced scallion, to taste

for the Ponzu sauce-

Start by making the Ponzu sauce. Add the soy sauce into a medium sized bowl. Juice the lemon and orange through a strainer over the bowl of soy sauce. Add the mirin and pepper flake, whisk until combined. Set aside and reserve.

Ponzu sauce can be made ahead and will keep up to 1 week in the fridge.

for the latkes-

Preheat the oven to 325°F/165°C.

Peel and grate the potatoes, Daikon, and onion into a large bowl. Using a clean dish towel, squeeze the moisture out of the combined potatoes, Daikon and onion. This step ensures a crispy latke!

To a large bowl, add the potatoes, Daikon and onion. Add the sliced scallion, beaten eggs, flour and salt to the bowl. Mix until just combined.

Line a sheet pan with paper towels.

Add about ⅛-¼ inch of oil to a large heavy-bottomed skillet, cast iron is ideal. Over medium high heat, allow the oil to get hot. Test the oil with a small piece of potato. If it immediately starts to sizzle and bubble the oil is ready. Form the latkes into small thin patties. I make mine to fit the palm of my hand, but these can be as wide or small as you prefer.

Carefully add the latkes to the hot oil. Brown on one side for 2-3 minutes, flip and brown for another 2-3 minutes. Occasionally, rotate the pan or adjust the heat to ensure even browning and cooking. Like pancakes, the first batch is usually the worst, so don’t get discouraged. When browned and crispy on each side transfer the cooked latkes to the lined sheet pan and allow to rest.

Fry the latkes in batches, be careful not to crowd the pan. Add more oil as necessary to maintain a constant level. Adding more oil will drop the temperature, so adjust the heat as necessary.

Keep the latkes warm in the oven until ready to serve (remove paper towels from sheet pan). Serve warm and fresh!

for the garnish-

Using a microplane or the small size on a box grater, grate the Daikon radish. Thinly slice the scallion.

to serve-

Top each latke with the grated Daikon radish and sliced scallion. Serve alongside the Ponzu dipping sauce.

In Vegetarian, Dinner, Lunch, Appetizer Tags Latke, Jewish food, Japanese, Ponzu, Dipping Sauce, Vegetarian, Hanukkah, Chanukkah, Holiday fodo
Comment

Mushroom and Goat Cheese Tart

November 23, 2015

Whether you're looking to make a substantial vegetarian dish for your Thanksgiving table, or whether you just love making savory tarts any time of year, this recipe is super easy, delicious, and endlessly modifiable.

Yes, it uses store bought puff pastry. In terms of pre-made things, puff pastry and phyllo dough are two of things I prefer to buy already made. They're complicated and time consuming pastry to make at home, and there are excellent versions of both at the market.

In the picture above I made the tart without egg and creme fraiche/sour cream. The egg and cream will bind the mushrooms a little better, but frankly, I didn't mind it with the mushrooms coming apart a bit. It tasted more mushroomy. If you do use the egg binder, then make sure you're mixture isn't too wet or your tart will get soggy.

If you're not a mushroom fan, you can take the same principles for making this tart, and make it with a combination of any other kind of filling: roasted squash and fennel, sautéed zucchini pepper and feta, potato leek... you get the idea. Basically, you want the filling to be mostly or partially cooked, so that you're really just putting the tart in the oven for the pastry's sake.

You can check out a video of this recipe on our Thanksgiving Pies series over at The Assembly Line . You can also follow us on Instagram or Facebook for weekly recipes and videos.

Mushroom Goat Cheese Tart

Makes one tart, serves 6-8

  • 2 tablespoons butter
  • 2 tablespoons olive oil
  • 2 shallots, sliced thin
  • 1 lb. mushrooms, sliced thin (crimini, oyster, hen of the woods, chanterelles or
  • whatever is available)
  • 3 cloves garlic, minced fine
  • splash of sherry vinegar
  • 1 teaspoon kosher salt
  • freshly ground pepper
  • ¼ cup sour cream (or creme fraiche)
  • 1 medium egg
  • ⅓ cup goat cheese, crumbled (or to taste)
  • 2 sprigs thyme, leaves removed from stem
  • 1 sheet puff pastry, thawed and cold
  • chopped chives, for garnish

Preheat oven to 400°F.

In a large skillet, add the butter and olive oil. Add the sliced shallots to the butter and oil. Stir and let the shallots heat up for 2 minutes, until just fragrant and slightly softened. Add the mushrooms to the shallots, and cook until the mushrooms are softened and the moisture has evaporated, about 5-6 minutes. Add the garlic and sherry vinegar to the pan and sauté for an additional 1-2 minutes. Season generously with salt and pepper. Transfer the mixture to a bowl, and allow the mushrooms to fully cool.

In a small bowl combine the sour cream and egg until the egg is fully incorporated. Add the sour cream mixture to the cooled mushroom mixture in the bowl, stir until fully combined.

Roll out your puff pastry so that it is larger in size than a large dinner plate. Using the dinner plate upside down as a stencil, cut a circle out of the puff pastry. Using a smaller salad plate, gently score an inner circle inside of the larger puff pastry circle. Using a fork, gently poke the inner circle of the puff pastry.

To assemble the tart- Add the mushroom mixture to the inner circle of pastry. Use a slotted spoon to transfer the mushrooms, any extra liquid can remain in the bowl. Top with goat cheese and thyme. Brush the outer edges of the pastry with egg wash.

Bake for 20-25 minutes, or until the pastry is browned and fully cooked.  Once fully cooked, top with fresh chives. Serve warm or at room temperature.

In Dinner, Lunch, Vegetatian, Appetizer Tags Mushroom, vegetarian, vegetables, tart, pastry, savory, goatcheese, dinner, thanksgiving, side
Comment

Pear, Rosemary and Goat Cheese Crostata

November 11, 2015

I never tire of making crostata's and galettes (as is obvious on this blog). I love that they can be sweet or savory, or walk the line between sweet or savory. I also love that the pastry is simple, with very little wait time. And most importantly, it's a great way to use up some extra ripe fruit.

This pear and goat cheese crostata walks the line between sweet and savory. It's great as an afternoon snack with a cup of tea or coffee (or glass of wine!), or sliced into small wedges as an appetizer at a dinner party. It could also be a dessert, if you're into serving something not too sweet. Also, add more sugar, it will be sweeter. Take away the goat cheese, it will be less savory. The rosemary adds such a nice hit of green and aromatic flavor with or without cheese. If you don't have rosemary, try something else: thyme, black pepper, tarragon, or maybe even marjoram. 

If you don't have a food processor, you can even make the crostata dough by hand (and it's arguably better that way). A food processor helps if you're nervous about mixing it all up evenly and well. Also, good butter helps. This is a good place to splurge on a nicer brand as there really aren't too many ingredients in this pastry. For flour, I prefe King Arthur brand, for its high protein content, but any kind will do. And if you don't want dairy, you could use a quality vegan margarine (like Earth Balance) in the dough; it will make the pastry a little saltier (so omit any additional salt), and it's not quite as great as butter, but it 100% works. 

And lastly, the pears. You want good pears. I like them in this dish when they're really ripe. Even a little bruised is ok. If they're too hard the tart doesn't bake as evenly. You use Bosc, Anjou, or whatever you can get your hands on that's good at the market. You don't need to peel them, and they add such a nice pop of color. 

Pear, Rosemary and Goat Cheese Crostata

Serves 4

For the pastry-

  • 1¼  cup all purpose flour

  • 1 tablespoon sugar

  • 1 teaspoon salt

  • ½ cup (1 stick) cold butter, cubed

  • 1 teaspoon apple cider vinegar

  • 3 tablespoons ice cold water

  • 1 large egg yolk, lightly beaten

  • turbinado or raw sugar, for sprinkling

For the filling-

  • 2 pears (about 1 lbs / 450 grams), ripe but still firm, thinly sliced

  • 2 tablespoons turbinado sugar

  • 2 tablespoons honey, plus more for garnish (local honey)

  • 1 teaspoon fresh rosemary, roughly chopped

  • juice of ½ a lemon

  • 4 oz. fresh goat cheese

To a food processor, add the flour sugar and salt. Pulse a few times to combine the mixture. Add the cubed butter to the dry ingredients, pulse until pea-sized pieces of dough are formed. Alternatively, you can use your hands or a pastry cutter to combine the dry ingredients with the butter.

To the dough, add the apple cider vinegar and 1 tablespoon of water at a time. Pulse until the dough comes together into a ball but is not too wet. It should stick together between your fingers when squeezed. Roll the dough into a ball, wrap tightly in plastic wrap, and refrigerate for at least one hour.

While your dough is chilling, prepare the fruit and cheese. To a bowl, add the sliced pear, sugar, honey, rosemary, and lemon juice.

Preheat your oven to 400°F (205°C)

Roll the dough out onto a lightly floured sheet of parchment paper. The dough should roll out to about 12-13 inches in diameter, or about ½ an inch thick. The edges do not have to be perfect. Leaving a 1.5-2 inch border, pile the sliced pears into the middle of the crust. Dollop the goat cheese over the top of the pears. Fold the edges of dough over the pears.

Brush the top of the dough with the beaten egg yolk. Sprinkle the Turbinado or raw sugar over the brushed dough. Transfer the crostata with the parchment paper onto a baking sheet.

Bake the crostata for 45-50 minutes, or until the crust is golden brown and the pears are tender. If the crust starts to brown too much before the pears are cooked, cover the the exposed crust with foil. Drizzle a little honey over the hot crostata. Slice and serve warm or room temp.

In Dessert, Dinner, Appetizer Tags Pear, Goat cheese, Rosemary, Crostata, Pastry, Baking, Homemade, Vegetarian
2 Comments
← Newer Posts

Latest

Featured
IMG_3606.jpeg
May 27, 2025
Sheet-pan Lemony Potatoes and Baby Artichokes
May 27, 2025
May 27, 2025
IMG_3784.jpeg
May 12, 2025
The Secret to Crispy Tofu Every Time + A Sweet & Spicy Gochujang Glaze
May 12, 2025
May 12, 2025
snackingcakeslices copy.jpg
Apr 11, 2025
One-bowl blueberry lemon snacking cake (gluten-free/grain-free)
Apr 11, 2025
Apr 11, 2025
IMG_5075.JPG
Feb 24, 2025
Manti (meat dumplings) in brothy tomato sauce
Feb 24, 2025
Feb 24, 2025
matzoballsontablecloth.jpg
Jan 20, 2025
Golden Chicken Soup with Matzo Balls
Jan 20, 2025
Jan 20, 2025
harissatofuandchickpeas.jpg
Dec 18, 2024
Sheet-Pan Crispy Harissa Tofu, Chickpeas, and Broccolini
Dec 18, 2024
Dec 18, 2024
caracaracake.jpg
Dec 4, 2024
Cara Cara Orange Olive Oil Cake
Dec 4, 2024
Dec 4, 2024
IMG_0640.JPG
Nov 6, 2024
Easy Roast Turkey for Thanksgiving
Nov 6, 2024
Nov 6, 2024
IMG_3282.JPG
Sep 19, 2024
Apple and Honey Dumplings
Sep 19, 2024
Sep 19, 2024
IMG_7173.jpeg
Jul 31, 2024
Galette with any kind of fruit
Jul 31, 2024
Jul 31, 2024
IMG_4004.jpeg
May 9, 2024
Cheddar Cheese Coin Crackers
May 9, 2024
May 9, 2024
DSC02602.JPG
May 2, 2024
Asparagus, Gruyere & Swiss Tart
May 2, 2024
May 2, 2024
whitebeansoupwithzhug.JPG
Mar 11, 2024
Yemenite White Bean Soup with Zhoug
Mar 11, 2024
Mar 11, 2024
DSC02301 (1).jpeg
Jan 24, 2024
Celery, kohlrabi, date salad with toasted almond and sesame
Jan 24, 2024
Jan 24, 2024
DSC02138.jpg
Dec 3, 2023
Sweet potato latkes with cranberry salsa
Dec 3, 2023
Dec 3, 2023
kompot_main photo.JPG
Jul 11, 2023
Ukrainian Summer Fruit Kompot
Jul 11, 2023
Jul 11, 2023
cherryvareniki mainphoto.jpg
Jun 15, 2023
Cherry Vareniki
Jun 15, 2023
Jun 15, 2023
tzimmescaketopdown.jpg
Apr 19, 2023
One-Bowl Tzimmes Cake
Apr 19, 2023
Apr 19, 2023

Sign up with your name and email address to join my mailing list.

I respect your privacy.

Thank you!

Privacy Policy can be found here

All photos copyright of Sonya Sanford unless otherwise indicated